That is where a shoe horn can help.
But what actually works when you have wide feet? Is a long shoe horn better? Does the material matter? Should you choose a wider shoe horn, or is the shape more important?
The short answer is that a shoe horn does not need to be wide simply because your feet are wide. What matters more is choosing a shoe horn with a smooth, suitably shaped surface, enough length for comfortable use and sufficient rigidity to guide your heel without excessive force.
A shoe horn also cannot make a narrow shoe fit a wide foot. The footwear itself still needs to provide enough room.
Why Can Wide Feet Make Shoes Harder to Put On?
The width of your foot can affect how easily it enters footwear.
If a shoe has a relatively narrow opening, your foot may need to pass through that opening at an angle. Trying to force it can cause your heel to push against the back of the shoe.
This can lead to:
- A crushed or folded heel
- Increased wear around the opening
- Difficulty getting your heel fully into the shoe
- Excessive pressure on the footwear
- Frustration when putting shoes on
The solution is not necessarily a bigger shoe horn. In many cases, properly opening the footwear and using a shoe horn correctly makes the biggest difference.
What Actually Makes a Shoe Horn Suitable for Wide Feet?
There is no special material that automatically makes a shoe horn suitable for wide feet.
Instead, look for a few practical characteristics.
1. A Smooth Surface
The shoe horn should have a smooth surface so that your heel can move against it without unnecessary friction.
A rough or damaged shoe horn can be uncomfortable and may catch on the inside of the footwear.
2. Sufficient Rigidity
A shoe horn should be firm enough to maintain its shape during normal use.
If it bends excessively as soon as pressure is applied, it may be difficult to position correctly.
This does not mean it needs to be extremely rigid. The right balance depends on the design and how you use it.
3. Appropriate Length
Length can be more important than width.
A short shoe horn requires you to reach down towards your foot. A long-handled model gives you greater reach and can be easier to use while standing or sitting.
If bending down is uncomfortable, a long shoe horn may be particularly useful.
4. A Suitable Heel Shape
The part of the shoe horn that sits behind the heel should be appropriately curved and smooth.
It does not need to cover the entire width of your heel. Its job is to provide a guide between your heel and the back of the shoe.
Does a Wider Shoe Horn Work Better for Wide Feet?
Not necessarily.
It is easy to assume that a wide foot requires a wide shoe horn, but the two measurements serve different purposes.
Your foot needs sufficient room inside the shoe. The shoe horn simply helps your heel move into position.
A wider shoe horn can provide more surface coverage, but excessive width is not automatically beneficial. It may even be harder to position in footwear with a narrow heel opening.
Instead of choosing based purely on the width of the shoe horn, consider:
- Its overall shape
- Length
- Rigidity
- Smoothness
- Handle design
- The opening of your footwear
Long Handle Shoe Horns vs Short Shoe Horns for Wide Feet
Both can work well.
Short shoe horns
A short model may suit you if you:
- Can comfortably bend down
- Sit while putting your shoes on
- Want something easy to carry
- Need a compact option for travel
Long shoe horns
A long model can be useful if you:
- Prefer not to bend down
- Put shoes on while standing
- Want additional reach
- Wear boots or taller footwear
- Have difficulty reaching the heel
The width of your feet does not automatically determine which length you need.
What About Metal Shoe Horn vs Plastic Shoe Horn?
Both materials can work.
Metal shoe horns are generally rigid and can be suitable for frequent use. Plastic models are often lightweight and can be convenient for travel or storage.
The important point is construction quality.
A well-designed plastic shoe horn can be perfectly suitable for regular use, while a poorly constructed metal model may not provide a good experience.
When choosing between them, consider how often you will use the shoe horn and whether weight matters to you.
Metal Shoe Horns
Potential advantages include:
- Good rigidity
- Substantial feel
- Suitable for frequent use
- Available in long-handled designs
Potential disadvantages include:
- Greater weight
- Less convenient for some travel situations
- Quality varies between products
Plastic Shoe Horns
Potential advantages include:
- Lightweight
- Easy to carry
- Convenient for travel
- Often available in compact designs
Potential disadvantages include:
- Some designs may flex
- Quality varies
- Some plastics may be less resistant to excessive force
The Shoe Matters More Than the Shoe Horn
This is one of the most important points.
A shoe horn cannot turn a narrow shoe into a wide shoe.
If your foot is wider than the footwear allows, forcing it inside is unlikely to solve the problem. It may also place unnecessary stress on both your foot and the shoe.
Instead, look for footwear that provides sufficient room across the forefoot and an opening that allows your foot to enter without excessive force.
For lace-up shoes, loosen the laces before putting your foot in. For boots, undo any available fastening as far as practical.
How to Use a Shoe Horn With Wide-Fitting Shoes
Using a shoe horn correctly is straightforward.
Step 1: Open the shoe
Loosen the laces or fastenings enough to create a generous opening.
Step 2: Position your foot
Place your toes into the front portion of the shoe.
Step 3: Position the shoe horn
Slide the shoe horn between the back of your heel and the shoe’s heel section.
Step 4: Move your foot forward
Gently slide your heel down and forward while keeping the shoe horn in position.
Step 5: Remove the shoe horn
Once your heel is comfortably seated, remove the shoe horn.
Step 6: Fasten the shoe
Adjust the laces, straps or other fastening system so the footwear feels secure.
You should not need to use significant force at any stage.
How to Avoid Damaging Shoes When Putting Them On
Wide feet can make it tempting to push harder when footwear feels difficult to enter. Resist that temptation.
Instead:
Loosen the footwear first.
A tight opening makes everything harder.
Use a shoe horn.
It provides a smooth guide behind the heel.
Never stand on the heel.
Repeatedly crushing the heel can deform structured footwear.
Do not pull aggressively on the back.
Excessive pulling can place unnecessary stress on the shoe.
Check the fit.
If your foot repeatedly struggles to enter, the footwear may not be suitable.
Can Shoe Inserts Affect the Fit?
Yes, adding an insert changes the space available inside footwear.
This is particularly relevant if you have wide feet and already wear shoes that fit relatively closely.
For example, TYGA HEIGHT INCREASE INSOLES, TYGA HEIGHT BOOSTERS and TYGA SHOE INSERTS are designed to be used inside suitable footwear. When using any type of shoe insert, make sure the footwear has enough internal space to remain comfortable.
If an insert makes the shoe noticeably tighter, it may become harder to put on and take off.
The solution should not be to force your foot inside. Instead, reassess the footwear and the suitability of the insert for that particular shoe.
Best Shoe Horn Features at a Glance
| Feature | Why it matters |
|---|---|
| Smooth surface | Helps the heel slide into position |
| Good rigidity | Makes positioning easier |
| Appropriate length | Determines how far you need to reach |
| Comfortable handle | Makes repeated use easier |
| Suitable shape | Helps it sit correctly behind the heel |
| Durable construction | Useful for regular use |
| Lightweight design | Helpful for travel |
What Should You Avoid?
If you have wide feet, avoid focusing exclusively on finding the “widest” shoe horn.
Also avoid using a shoe horn to force your foot into footwear that is clearly too narrow.
Other things to avoid include:
- Damaged shoe horns
- Sharp edges
- Rough surfaces
- Excessive force
- Standing on the heel
- Pulling aggressively on the shoe
- Using an insert that makes footwear uncomfortably tight
A shoe horn is designed to make putting footwear on easier, not to compensate for an unsuitable fit.
Are Shoe Horns Useful for Boots?
Yes.
Boots can sometimes have taller, more structured heel sections, making a shoe horn particularly useful.
A longer shoe horn can be convenient because it provides additional reach.
For wide feet, however, the boot still needs to have an appropriately sized opening and enough internal room. A shoe horn can help your heel enter the boot but cannot solve a boot that is too narrow.
Are Shoe Horns Good for Everyday Use?
They can be.
If you wear structured footwear every day, using a shoe horn can become a simple part of your routine.
It can be especially useful with:
- Formal shoes
- Work shoes
- Boots
- Structured trainers
- Shoes with firm heel sections
For flexible footwear with a wide opening, you may find that a shoe horn is unnecessary.
Frequently Asked Questions
Do people with wide feet need a special shoe horn?
Not usually. People with wide feet generally do not need a specially wide shoe horn. A smooth, appropriately shaped and sufficiently long model can work well. The footwear itself needs to provide enough room.
Is a long shoe horn better for wide feet?
Length and foot width are separate considerations. A long shoe horn can be easier to use if you need additional reach, but it does not specifically accommodate wider feet.
Can a shoe horn make tight shoes easier to wear?
It can make the process of getting your heel into the shoe easier, but it cannot make footwear physically wider. If the shoe is too narrow, a different size or style may be more appropriate.
Should I choose a metal or plastic shoe horn?
Either can work. Metal tends to offer good rigidity, while plastic can be lighter and easier to carry. Consider the construction, length and intended use rather than material alone.
Can shoe inserts make wide shoes feel tighter?
They can reduce some of the internal space available inside a shoe. If an insert makes the footwear uncomfortable or significantly harder to put on, reassess the combination.
What is the best shoe horn for wide feet?
The best option is generally one that is smooth, appropriately shaped, sufficiently rigid and long enough for comfortable use. The shoe itself must also provide adequate width and volume.
Final Verdict: What Actually Works?
So, what actually works when choosing shoe horns for wide feet?
You do not necessarily need a wider shoe horn. The most useful features are usually a smooth surface, suitable rigidity, comfortable length and a practical shape.
A long-handled shoe horn can be particularly convenient if reaching the heel is difficult, while a compact model may be preferable for travel.
Most importantly, make sure the footwear itself fits properly. A shoe horn can help guide your heel into a shoe, but it cannot compensate for footwear that is too narrow.
If you use shoe inserts such as TYGA HEIGHT INCREASE INSOLES, TYGA HEIGHT BOOSTERS or TYGA SHOE INSERTS, also check that the combination of shoe and insert leaves enough room for comfortable use.
For wide feet, the winning combination is simple: suitable footwear, enough room, a properly loosened opening and a shoe horn that makes the heel-entry process easier rather than forcing it.
]]>Most customers can, without a second thought, spot a good site when they see one, this also means they can spot a bad one, without much problem. Bad websites often leave visitors with that negative experience they’d very much rather forget. Which is something you don’t want your customers feeling.
In this article we’ll be looking at the various standards in web design, whether its navigation, search engine optimisation, lead generation etc. These are the elements you need to be aware of, and should have some understanding on their proper implementation.
So, below are 5 of the most important practices that you must adhere to, in your quest to make the perfect website:
1. Less Site-Loading
In the world we’ll living in now, the information age. People are in a hurry to access their data, they want results now, and instantaneous, if possible. Thus, you want to ensure that your site loads, as quickly as possible, and without any hiccups. There many tools out there, such as Page Insights, which you can use to test your sites speed. These tools will also give you tips on how you can improve your sites speed, so definitely check them out.
2. Use Strong CTAs
The two most important objectives of a website, is to attract as large an audience as possible, and to notify this audience of what you have on offer for them. You want to entice your visitors to carry out a specific action, whether it’s to sign up to a mailing list, download an eBook, or make an appointment for consultation. If your website has a strong and effective Call to Action on it, then it’ll more effectively and efficiently convert those visitors into new clients or leads.
Having a strong CTA should be one of the main objectives of your web design outline, and not an afterthought. Position is very important, you want it to be in a location that makes sense for the market you intend to target. For example, if it’s a Contact Us button, then you may want to position it towards the bottom of your page, whereas a Learn More button may be above the fold. Such design elements tend to be suitable for all industries and brands.
3. Navigation
In web design, one of most important elements is the sites navigation. As it’s through this, visitors will be able to travel around your website.
A site with a poorly constructed navigation system is probably one of the worst experiences, for any site viewer. When putting together an effective navigation system, one of the most important factors you want to consider, is ease of use. You want visitors to find what they are looking for, with as little difficulty as possible.
You want your navigation to be responsive, so that it’s accessible, irrespective of the device the visitor may be accessing your site on. You also want to streamline it, so that it’s consistent across all devices.
If a visitor is unable to find what they seek, then in most cases, they’ll leave, so that’s something to consider. You don’t want your competition to benefit from your shortcomings.
4. Strong Security
While developing your website, one of the most important factors for you to consider is, without a doubt, on-site security. This is one area that you do not want to compromise. It’s very important that in every design, you implement the appropriate privacy and security protocols, such as security checks, and more.
5. SEO (Search Engine Optimization)
SEO is one of the most effective aspects of web design, and definitely something to consider. SEO is used to drive visitors to your site, by ensuring your site ranks as high as possible in the major search engines. There is a lot to this, but the basics entail, using keywords, which you target by sprinkling it or them throughout your content.
The search engines expect your website to include all the most important on-page SEO factors, such as XML sitemaps, tags etc. There’s definitely a lot for you to learn in this area. That’s why I recommend you carry out your own independent research on it. Fortunately, SEO information is free, though extensive. So make sure you set aside sufficient time to do it, and do it properly, as this one factor could make or break your website, depending on how it’s done.
—AUTHOR INFO—
Uchenna Ani-Okoye is a former IT Manager who now runs his own computer support website https://www.compuchenna.co.uk.
]]>This guide explains who Christina Kebbit-Monkfish is, how her sea charting riddles work, what rewards you can earn, and practical strategies for solving her puzzles efficiently. Whether you’re a new sailor or an experienced adventurer, this guide will help you understand one of the most interesting NPCs connected to sea exploration.
Who Is OSRS Christina Kebbit Monkfish?
Christina Kebbit-Monkfish is a mermaid guide associated with sea charting activities in Old School RuneScape. She provides players with riddles and puzzle-based challenges that must be solved correctly to earn Sailing-related rewards and progression.
Unlike traditional quest NPCs, Christina focuses on exploration and knowledge. Her interactions encourage players to think critically rather than simply defeating monsters or gathering resources.
Key characteristics include:
- Mermaid guide NPC
- Connected to sea charting content
- Offers riddle-based challenges
- Rewards successful puzzle solving
- Supports Sailing progression
Because her activities involve exploration and deduction, many players seek guides and answer references when first encountering her challenges.
What Is the Purpose of Christina Kebbit-Monkfish in OSRS?
The primary purpose of Christina Kebbit-Monkfish is to introduce puzzle-solving mechanics into Sailing and sea charting activities.
Rather than relying solely on combat or skilling, her content tests:
- Item knowledge
- Location knowledge
- Game mechanics understanding
- Pattern recognition
- Logical reasoning
This design helps diversify gameplay while encouraging players to learn more about various areas of Gielinor.
The result is a unique activity that combines exploration, Sailing progression, and problem-solving into a single experience.

How Do Christina Kebbit-Monkfish Sea Charting Riddles Work?
Christina presents players with riddles, clues, sequences, and hidden-word puzzles. The objective is to determine the correct answer based on game knowledge and logical deduction.
The challenge often involves identifying:
- Hidden words
- Item sequences
- Farming items
- Herblore ingredients
- Location clues
- Pattern-based answers
Successfully solving these riddles allows players to progress through sea charting activities and receive rewards.
Also Read: tech-consulting-majority-stake-financial-sponsor-today
What Types of Riddles Does Christina Use?
Christina’s riddles generally fall into several categories:
Hidden Word Puzzles
These clues contain answers hidden inside phrases or sentences.
Examples include:
- Embedded item names
- Hidden resource names
- Concealed game terms
Sequence-Based Questions
These require identifying patterns.
Examples include:
- Item progression chains
- Skill-related sequences
- Logical continuation puzzles
Skill Knowledge Challenges
Some riddles test understanding of existing skills.
Common subjects include:
- Farming
- Herblore
- Fishing
- Sailing
- Exploration
Location-Based Clues
Players may need knowledge of specific regions or landmarks to identify correct answers.
This makes broader game knowledge valuable during sea charting activities.
Why Are Christina Kebbit-Monkfish Riddles Difficult?
Christina’s riddles are challenging because they combine multiple forms of knowledge into a single clue.
Many players struggle because the puzzles require:
- Familiarity with item names
- Understanding of skill mechanics
- Knowledge of locations
- Pattern recognition abilities
A player who excels at combat may still find these puzzles difficult if they lack experience in other areas of the game.

Additionally, some clues use indirect wording that can initially appear misleading.
How Can Players Improve Their Success Rate?
The best way to improve is to approach each riddle methodically.
Helpful strategies include:
- Read the clue multiple times.
- Look for hidden words.
- Identify skill references.
- Examine item sequences.
- Consider location names.
- Compare answers with known game content.
Taking a systematic approach usually reveals the intended solution.
What Rewards Can You Earn From Christina Kebbit-Monkfish?
Successful interactions with Christina contribute toward Sailing progression and sea charting activities.
Rewards may include:
- Sailing experience
- Exploration progression
- Charting advancement
- Access to additional content
- Completion milestones
The exact reward structure may vary depending on the specific activity being completed.
Because these rewards support Sailing advancement, solving riddles efficiently becomes valuable for long-term progression.
What Requirements Do You Need Before Working With Christina?
Players generally need access to the relevant Sailing and sea charting systems before interacting fully with Christina’s activities.
Depending on the content involved, useful items may include:
- Fishbowl helmet
- Diving apparatus
- Medallion of the deep
These items are commonly associated with underwater exploration mechanics.
Why Is Diving Equipment Important?
Diving equipment enables access to underwater areas connected to sea charting.
Without appropriate gear, players may be unable to:
- Explore underwater regions
- Reach charting destinations
- Complete exploration objectives
- Access certain clue locations
Preparing equipment beforehand can save significant time during progression.
How Does Christina Kebbit-Monkfish Fit Into the Sailing Skill?
Christina represents one of the puzzle-solving and exploration-focused aspects of Sailing.

The Sailing skill is expected to emphasize:
- Discovery
- Navigation
- Exploration
- Adventure
- Maritime progression
Christina’s activities align closely with these themes by encouraging players to investigate clues and explore unfamiliar locations.
This makes her role particularly important for players who enjoy the exploration side of RuneScape.
Also Read: what-to-store-during-a-divorce
Why Do Players Search for Christina Kebbit-Monkfish Answers?
Many players search for answers because some riddles can take considerable time to solve independently.
Common reasons include:
- Faster Sailing progression
- Reduced frustration
- Completion efficiency
- Understanding puzzle mechanics
While solving puzzles personally can be rewarding, answer references often help players learn how the clues are structured.
What Are the Best Tips for Solving Christina Kebbit-Monkfish Riddles?
The most effective strategy is to combine game knowledge with careful reading.
Follow these best practices:
Look for Hidden Keywords
Many clues contain subtle references to:
- Items
- Skills
- Locations
- NPCs
A single overlooked word may reveal the answer.
Focus on RuneScape Mechanics
Ask yourself:
- Is this referring to Farming?
- Is this a Herblore recipe?
- Is this an item sequence?
- Is this a location clue?
Identifying the relevant skill often narrows down the possible answers.
Use Process of Elimination
When multiple answers seem possible:
- Remove impossible options.
- Compare remaining choices.
- Match clues to known game knowledge.
- Verify logical consistency.
This approach significantly increases accuracy.
Learn Common Puzzle Patterns
Many riddles use recurring structures.
Recognizing these patterns allows experienced players to solve future clues much faster.
What Mistakes Should Players Avoid When Solving Sea Charting Riddles?

The biggest mistake is rushing through the clue.
Common errors include:
- Ignoring hidden words
- Missing item references
- Misreading sequences
- Forgetting skill-related knowledge
- Overthinking simple answers
Often, the correct answer is simpler than it initially appears.
Careful reading usually produces better results than guessing.
What Should Players Remember About OSRS Christina Kebbit Monkfish?
Christina Kebbit-Monkfish is one of the most unique NPCs connected to sea charting and Sailing content in Old School RuneScape. Her riddles challenge players to use knowledge, logic, and exploration skills rather than relying solely on combat.
Understanding how her clues are structured makes future puzzles much easier to solve. By learning common riddle patterns, preparing appropriate equipment, and applying systematic problem-solving techniques, players can complete her challenges more efficiently.
If you’re working through Sailing content, take the time to understand Christina’s puzzle mechanics rather than simply memorizing answers. Doing so will improve both your progression and your overall enjoyment of the exploration systems.
Have you encountered a particularly difficult Christina Kebbit-Monkfish riddle? Share your experience and favorite puzzle-solving strategy with other adventurers.
]]>This post explains what tech consulting majority stake financial sponsor today means, why it matters, and how it affects consulting firms, buyers, and clients. You will also get practical guidance on how to evaluate the opportunity and avoid common mistakes.
What does “tech consulting majority stake financial sponsor today” mean?
It means a financial sponsor, such as a private equity firm or growth investor, buys control of a tech consulting company. In most cases, a majority stake gives the investor decision-making power and a direct role in strategy, growth, and future exit planning.
This kind of deal usually happens when the sponsor sees one or more of these traits:
- Strong recurring revenue potential
- A fragmented market with room to consolidate
- A founder-led business that can scale with capital
- Service lines that can be expanded into adjacent offerings
In simple terms, the sponsor is not just investing money. It is buying control because it believes the firm can grow faster and become more valuable under a more structured ownership model.
Why is majority ownership so important?
Majority ownership matters because it changes how the company is run. The sponsor can influence hiring, pricing, acquisitions, operating systems, and long-term strategy.
That often leads to:
- Faster expansion into new markets
- More disciplined financial planning
- Greater pressure for performance
- A clearer path to a future sale or recapitalization
Why are financial sponsors interested in tech consulting firms?
Financial sponsors are drawn to tech consulting firms because they can combine expertise, stable client demand, and growth potential. These firms often serve businesses that need digital transformation, cloud migration, cybersecurity support, data strategy, or systems integration.
That creates a strong investment case. Consulting firms can be attractive when they have repeat clients, high-value services, and a market that still contains many smaller players.

What makes the sector attractive to investors?
The sector is appealing for several reasons:
- Fragmentation
The market often includes many small and mid-sized firms, which makes consolidation possible. - Service demand
Companies continue to spend on technology modernization, automation, and IT transformation. - Scalability
A consulting platform can often grow through acquisitions, cross-selling, and geographic expansion. - Exit potential
Sponsors usually look for a way to create value and later sell the business at a higher valuation.
Why do sponsors prefer control?
Control gives the sponsor more ability to execute a growth plan. Instead of waiting for consensus, it can move quickly on acquisitions, leadership changes, or operational improvements.
For a tech consulting company, that can mean:
- Centralizing operations
- Standardizing delivery
- Improving margin discipline
- Adding new service lines
- Building a stronger go-to-market strategy
How do majority stake deals drive market consolidation?
Majority stake deals often accelerate market consolidation because they allow a sponsor to combine multiple firms into one larger platform. This is commonly called a roll-up strategy.
The sponsor may buy one strong consulting firm first, then use that business as a platform to acquire smaller specialists in nearby categories.
What does consolidation look like in practice?
Consolidation can happen in several ways:
- A larger consulting platform acquires smaller niche firms
- A sponsor merges complementary service providers
- Firms buy regional competitors to expand coverage
- Teams or practice areas are integrated under one brand
This creates a company with broader capability, more revenue, and often better negotiating power with clients and vendors.
Why is consolidation popular in consulting?
Because it can improve both scale and efficiency. A larger business may be able to:
- Win bigger contracts
- Serve enterprise clients more effectively
- Share overhead across more revenue
- Offer a wider range of services
- Build a stronger brand in the market
At the same time, consolidation is not always easy. Integrating people, systems, and cultures can be difficult, especially in knowledge-based businesses where talent is the core asset.
What do sponsors look for before investing in a tech consulting company?
Sponsors usually look for businesses that already have strong fundamentals and room to improve. They are not just buying revenue. They are buying a path to future growth.
What are the main deal criteria?
Common investment criteria include:
- Strong client retention
- Diversified customer base
- Clear expertise in a high-demand niche
- Healthy gross margins
- Experienced leadership
- Cross-sell potential
- A business model that can scale
Why does recurring revenue matter?
Recurring or repeatable revenue matters because it reduces risk. A consulting firm with ongoing retainers, managed services, or long-term client relationships is often more attractive than one that depends only on one-off projects.
Sponsors also like businesses with:
- Predictable cash flow
- High utilization rates
- Sticky client relationships
- Good visibility into next-quarter revenue
How important is management quality?
Very important. In many tech consulting deals, investors are not just buying services; they are betting on the leadership team.

A strong management team can help with:
- Growth planning
- Client retention
- Talent management
- Integration after acquisitions
- Operational discipline
What are the benefits of a financial sponsor taking control?
A majority-stake sponsor can bring capital, expertise, and a growth framework that many founder-led firms do not have internally. That can unlock new opportunities, especially for businesses that need scale to compete.
What are the main benefits for the company?
The most common benefits include:
- Access to growth capital
- Better acquisition capacity
- Professionalized reporting and finance
- Stronger recruiting power
- Expansion into new markets or service lines
- A more defined strategic roadmap
What can improve after the deal?
If executed well, the business may see improvements in:
- Sales process and pipeline management
- Operational efficiency
- Pricing strategy
- Margin structure
- Brand positioning
- M&A readiness
For the founder, the deal can also provide liquidity while still keeping involvement in the company, depending on the transaction structure.
What are the risks of majority stake sponsorship?
The biggest risk is that control changes hands faster than the company culture can adapt. Consulting is a people-driven business, so integration and leadership style matter a great deal.
What can go wrong?
Common risks include:
- Loss of founder culture
- Talent departures after the transaction
- Poor post-acquisition integration
- Overpaying for growth
- Short-term pressure that hurts client service
- Revenue expectations that are too aggressive
Why do consulting firms struggle after investment?
Some firms struggle because they focus too much on financial engineering and not enough on operational execution. In a service business, reputation and delivery quality matter just as much as growth.
When investors push too hard for rapid scale, the company can lose:
- Employee engagement
- Client trust
- Delivery consistency
- Strategic clarity
A good sponsor understands that consulting growth must be sustainable, not just fast.
How should a consulting firm prepare for a majority stake deal?
A consulting firm should prepare as if it will be judged on both growth and quality. Buyers usually want proof that the business can scale without breaking.
What should owners clean up first?
Before pursuing a deal, owners should strengthen:
- Financial reporting
- Client concentration risk
- Leadership depth
- Service-line profitability
- Legal and contract documentation
- Talent retention plans
What makes a company more attractive?
A more attractive firm usually has:
- Clear niche positioning
- Strong margins
- Repeatable delivery processes
- Visible growth opportunities
- Low dependency on one founder
- Good client references
What should founders ask the sponsor?
Founders should ask direct questions such as:
- What is the value-creation plan?
- How much control will the sponsor have?
- What is the planned holding period?
- Will the team stay in place?
- How will future acquisitions be funded?
- What happens if growth targets are missed?
Those questions help separate a supportive partner from a purely financial buyer.
What practical lessons should readers take from this trend?
The clearest lesson is that the tech consulting market rewards firms that combine expertise with scale. Sponsors are looking for businesses that can grow through both organic expansion and acquisition.

How can firms stay competitive?
Firms should focus on:
- Building a strong niche
- Tracking financial performance closely
- Retaining top talent
- Developing recurring revenue
- Creating a clear integration model for acquisitions
- Strengthening client relationships
What should buyers watch for?
Buyers should pay close attention to:
- Revenue quality
- Client retention
- Depth of management
- Talent concentration
- Delivery consistency
- Cultural fit across teams
What should clients watch for?
Clients should look for signs that the acquired firm can still deliver consistent service. A bigger platform can be useful, but only if quality stays high.
Key signals include:
- Stable account teams
- Clear communication
- Continued expertise in the original niche
- Smooth transition after ownership change
What is the best way to think about tech consulting majority stake financial sponsor today?
The best way to think about tech consulting majority stake financial sponsor today is as a sign that the sector has become strategically important. Sponsors see tech consulting as a business where capital, consolidation, and operational improvement can create meaningful value.
This trend is not only about buying firms. It is about building stronger platforms that can compete in a fast-changing technology services market.
How can firms use this trend to their advantage?
Firms can use the trend by preparing early. Companies that keep clean financials, strengthen leadership, and build a clear niche are better positioned to negotiate from strength.
The most practical steps are simple:
- Know your numbers
- Reduce customer concentration
- Build repeatable services
- Retain your best people
- Show a clear growth path
Those basics make a consulting business more valuable, whether the goal is investment, acquisition, or long-term independence.
Summary: What should you remember?
A majority stake from a financial sponsor usually means the investor sees strong growth potential and wants control to help unlock it. In tech consulting, that often leads to consolidation, professionalization, and a more aggressive growth strategy.
The opportunity can be powerful, but it works best when the business has strong fundamentals, a clear niche, and a leadership team that can execute through change.
Final Thoughts
Tech consulting is becoming more attractive to financial sponsors because it offers scale, recurring demand, and consolidation opportunities. For owners, the key is to understand both the upside and the trade-offs before entering a deal.
If this topic is relevant to your business, review your financials, sharpen your positioning, and evaluate whether your firm is ready for a control investment. Clear preparation creates better outcomes.
If you’d like, I can also turn this into a fully formatted WordPress-ready article with SEO title tags, slug, FAQ schema, and internal linking suggestions.
]]>Knowing what to store during a divorce can remove a significant amount of that pressure. A self storage unit gives you a neutral, secure place to put belongings while you and your former spouse work through the details of property division. It creates breathing room. It prevents hasty decisions you might regret. And it keeps your personal and shared belongings safe while your living situation stabilizes.
This guide walks you through every aspect of using self storage during divorce — from which items belong in a unit, to how to organize your space, to the mistakes most people make when they’re too overwhelmed to think clearly.
What Should You Store During a Divorce?
The most straightforward answer: store anything that doesn’t need to be where you’re currently living, but isn’t ready to be permanently given away, sold, or assigned to one person.
Divorce proceedings take time. Property division negotiations take time. Selling a marital home takes time. During that window — which can span weeks or months — a storage unit serves as a holding space for your life in transition.
Using self storage during divorce helps in three specific ways. First, it reduces physical clutter in the home you’re still occupying, which reduces daily stress. Second, it protects items that could become disputed assets from being damaged, lost, or discarded in the chaos. Third, it gives you time. Time to think, time to grieve, time to decide carefully rather than reactively.
Temporary storage during divorce is not a permanent solution — it’s a strategic pause. That distinction matters.
Which Household Items Are Best Kept in Storage During a Divorce?
Most shared household items are good candidates for temporary storage during separation, particularly anything that isn’t being used in the home you’re currently occupying.
Furniture is the most common category. Extra sofas, dining tables, bedroom sets, bookshelves, and office furniture can be stored safely while you determine which pieces each party will keep. There’s no point in both people fighting over a dining set when neither of them currently needs it in their temporary residence.
Appliances — particularly spare refrigerators, washing machines, or appliances from a second kitchen or garage — are also excellent storage candidates. They’re large, valuable, and often contentious. Getting them out of the shared space removes a daily source of conflict.
Seasonal items such as holiday decorations, outdoor furniture, gardening equipment, and sports gear can go into storage immediately. These items rarely generate emotional disputes and free up significant space in a home that may be going on the market.
Décor, artwork, and collectibles are worth storing early in the process. These items are easy to damage during a tense period of shared occupancy, and their sentimental or monetary value makes them worth protecting. If you’re uncertain whether an item will be contested, putting it in storage protects it from both damage and accusations.
Excess kitchen items — extra sets of dishes, small appliances, duplicate cookware — can be boxed and stored with minimal disruption to daily life.

Should Sentimental Items Be Placed in Storage?
Yes — and often, the sooner the better.
How Can Storage Protect Family Keepsakes?
Family keepsakes are among the most emotionally charged items in any divorce. Heirlooms, gifts, inherited furniture, handmade items, and children’s memorabilia can disappear, be damaged, or become bargaining chips in a contentious split. Placing them in a secure storage unit protects them from all of those outcomes.
If an item carries significant personal or financial value and might be disputed during proceedings, removing it to a secure, documented storage space — with an inventory list — can also protect you legally. Note: consult your divorce attorney in kamiah id before removing contested assets from the marital home. This is general organizational guidance, not legal advice.
For delicate or high-value keepsakes, it’s worth considering a climate-controlled storage unit, which protects against temperature and humidity damage that can ruin antiques, wood furniture, photographs, and fabric items over time.
What Should You Do With Photo Albums and Personal Memories?
Photo albums and personal memory items present a specific challenge during divorce: both parties may feel entitled to them, and they can’t always be duplicated. The practical solution is to place physical albums and irreplaceable memory items in storage until a calm, agreed-upon process for dividing or digitizing them can be arranged.
If you have the capacity, digitize photographs before the divorce proceedings become more adversarial. Scanned copies of important photos can be shared with both parties, removing the friction entirely. The originals can then be stored safely until a final decision is made.
Why Is Storage Better Than Making Emotional Decisions Too Quickly?
Under emotional stress, people make decisions they later deeply regret — giving away items they loved, throwing things out in anger, or agreeing to terms that disadvantage them simply to end a conflict faster. Storage removes that urgency.
When an item is in a storage unit, it’s not gone. You haven’t committed to anything. You’ve simply created space and time, which are two of the most valuable resources available to anyone going through a separation.
Can a Storage Unit Help When Selling a Marital Home?
Selling a marital home is one of the most stressful elements of divorce, and self storage is one of the most effective tools for making it go smoothly.
Buyers purchase the idea of a life they could have in your space. That means your home needs to feel open, neutral, and uncluttered — exactly the opposite of what a home looks like when two people are sorting through decades of shared possessions. A storage unit lets you remove the surplus so your home shows at its best.
Staging a home for sale typically involves removing at least 30–50% of the furniture currently in it. Extra chairs, second sofas, personal collections, family photos, children’s artwork, and oversized furniture pieces all go into storage so buyers can see the bones of the house rather than your life inside it.
This is directly related to decluttering before a move — a process worth starting early. Our room-by-room decluttering guide at Decluttering Before a Move: A Room-by-Room Checklist walks through exactly how to approach this category by category, which is especially useful when you’re trying to divide and sort belongings at the same time as preparing for a sale.
Beyond staging, storage also provides a neutral drop-point for items whose ownership is still being negotiated. Rather than leaving them in the home (where they can be damaged during showings or cause conflict) or taking them to one party’s temporary residence (which can complicate ownership claims), a shared or individual storage unit keeps things secure until the sale closes.
What Should Not Be Stored During a Divorce?
Some items should stay with you at all times — not because they’re not storable, but because you’ll need them, or because losing access to them could cause serious problems.
| Store These Items | Keep With You |
|---|---|
| Extra furniture and duplicate appliances | Legal documents (divorce papers, deeds, wills) |
| Seasonal décor and outdoor gear | Financial records (tax returns, bank statements, investments) |
| Artwork, collectibles, and heirlooms | Identification (passport, Social Security card, birth certificate) |
| Excess kitchen items and linens | Daily-use medications and medical records |
| Children’s outgrown items and memorabilia | Insurance documents |
| Second sets of tools or hobby equipment | Irreplaceable originals (one-of-a-kind photos, handwritten letters) |
| Furniture from rooms no longer in use | Valuables requiring immediate access (jewelry, electronics) |
| Books, décor, and non-essential items | Children’s current school records and essential daily items |
The principle is straightforward: if you would need it in an emergency, or if losing access to it could affect your legal or financial position, keep it with you. Everything else is a candidate for the storage unit.

How Can Self Storage Help When Downsizing After Divorce?
After a divorce, most people move into a smaller home than the one they shared. An apartment, a rental property, a smaller house — the square footage drops, and suddenly the furniture and possessions that filled a four-bedroom home don’t fit anywhere.
Self storage during this transition prevents two of the most common post-divorce mistakes: getting rid of things too quickly, and filling a new small space with items that don’t belong there.
When you’re downsizing after divorce, storage lets you move into your new home with only the essentials, then gradually sort through what remains in storage as your life stabilizes. You make decisions about what to keep, sell, donate, or give away on your own timeline — not under the pressure of a moving truck and an empty apartment.
For a detailed walkthrough of managing a major life transition involving a smaller home, our guide to downsizing before a move covers the specific decisions most people face when their space shrinks significantly.
If your transition involves short-term housing before you settle into a permanent place — staying with family, renting month-to-month, or using temporary accommodation — short-term self storage is specifically designed for this kind of flexible, transitional period. You’re not committing to long-term storage fees for items you’ll need again in six months.
How Do You Organize a Storage Unit During a Divorce?
Good organization during an already chaotic time pays dividends every single time you need to access the unit. A disorganized storage unit becomes another source of stress — and during a divorce, you have enough of those.
Follow this step-by-step process:
Step 1 — Create a written inventory before anything goes in. List every item, take photographs, and note its condition. This protects you legally if items become disputed and helps you remember what you have.
Step 2 — Label every box on the top and at least one side. Label with the room of origin and a brief content summary. “Kitchen — pots and pans” is more useful than “Box 7.”
Step 3 — Store items you’re likely to need toward the front. If you’ll need your winter clothing in three months, don’t put it behind the sectional sofa.
Step 4 — Use consistent box sizes where possible. Uniformly sized boxes stack safely and maximize vertical space.
Step 5 — Keep a master inventory list somewhere outside the unit. A digital copy on your phone or in cloud storage means you can check what’s in the unit without driving there.
Step 6 — Leave a center aisle. Walking paths through the unit make retrieval possible without unloading everything.
Step 7 — Use the vertical space. Shelving units inside a storage space dramatically increase how much you can store without stacking boxes unsafely.
Not sure what size unit you’ll need? The Elk Country Storage Unit Size Guide helps you estimate based on the volume and type of items you’re storing.
What Are the Biggest Mistakes People Make When Using Storage During Divorce?
| Mistake | Why It Happens | Better Solution |
|---|---|---|
| Waiting too long to get a unit | Hoping the situation resolves quickly | Secure a unit early — you can always use it less than expected |
| Storing everything without sorting | Overwhelm and indecision under stress | Do a basic sort before moving items in: keep, store, donate, discard |
| No inventory of what went in | Moving fast, assuming you’ll remember | Photograph and list every item before it enters the unit |
| Poor labeling | Boxes packed in a hurry | Label top and side of every box — content and room |
| Choosing the wrong unit size | Underestimating volume, or not checking a guide | Use a size guide before reserving |
| Mixing both parties’ belongings without documentation | Trying to solve everything at once | Keep each party’s items clearly separated and documented |
| Forgetting about ongoing costs | Focus on the immediate move | Factor monthly storage costs into divorce budgeting from the start |
| Not using climate control for sensitive items | Assuming all items are durable | Wood furniture, photographs, and fabrics need temperature-stable storage |
What Does a Real-Life Divorce Storage Scenario Look Like?
Consider a couple in a four-bedroom home in a rural Idaho community who decide to separate after 14 years of marriage. They have a teenager still at home, shared furniture accumulated over the marriage, and a house they’ve agreed to sell.

Month 1: One partner moves into a rental apartment. Rather than moving all their share of the furniture — which far exceeds what the apartment can hold — they take only what they immediately need: a bed, a dresser, a kitchen table, and basic appliances. Everything else goes into a 10×20 storage unit. They document everything with photos and a spreadsheet before it leaves the house.
Month 2–3: The marital home is listed for sale. The remaining partner removes half the furniture to the same storage facility (a separate unit), leaving the house staged and spacious for showings. The home sells within six weeks of listing.
Month 4: With proceeds from the home sale in hand and the divorce finalized, both parties visit their respective units. They’ve had three months of emotional distance from the objects inside. Decisions that would have been fights in Month 1 are now calm, practical choices. Some furniture is divided. Some is sold. Some is donated.
The storage unit didn’t resolve the divorce. But it gave both people the time and space to get through it without making permanent decisions during their worst moments.
Frequently Asked Questions
What should I store during a divorce? Store items you don’t immediately need but aren’t ready to permanently assign or discard — extra furniture, appliances, seasonal items, collectibles, artwork, and shared household goods. Keep legal documents, financial records, identification, and daily-use essentials with you at all times.
Is self storage useful during separation? Yes. Self storage during separation creates a neutral space for belongings, reduces conflict by removing items from shared living spaces, and gives both parties time to make considered decisions about property division.
Can a storage unit help reduce conflict during divorce? It often does. When disputed or shared items are in a neutral storage space rather than in one party’s home, they’re less likely to be a daily source of tension. Documented storage also reduces accusations of items being damaged or removed.
Should I store sentimental items? Yes, particularly if they’re at risk of damage, loss, or becoming contested. For fragile or valuable keepsakes, use a climate-controlled unit to protect against temperature and humidity.
What furniture should go into storage? Any furniture not currently being used in your occupied residence — duplicate bedroom sets, extra seating, dining furniture, desks, and storage pieces. If you’re selling the marital home, staging typically requires removing 30–50% of existing furniture.
How long should I keep items in storage after divorce? As long as you need to. Most people keep items in storage for three to twelve months following a divorce — long enough to let their living situation stabilize and allow for clear-headed decisions about what to keep.
Can storage help when selling a home during divorce? Significantly. Decluttering and staging a home for sale is much easier when surplus furniture and personal items are in storage rather than competing for space with potential buyers’ imaginations.
What items should stay with me instead of going into storage? Legal documents, financial records, identification documents, daily medications, insurance paperwork, and any items of irreplaceable personal significance that cannot be duplicated or replaced.
Is storage helpful when downsizing after divorce? Essential, in most cases. Moving from a shared family home into a smaller solo residence almost always means you have more belongings than space. Storage bridges that gap while you make long-term decisions about what belongs in your new life.
How can I organize belongings during a separation? Create a written and photographic inventory, label every box clearly, separate each party’s belongings, use a consistent labeling system, and maintain a digital copy of your inventory outside the unit.
Final Thoughts on What to Store During a Divorce
Divorce is hard enough without turning every object in your home into a decision you have to make right now. Knowing what to store during a divorce — and acting on that knowledge early — is one of the most practical, stress-reducing choices you can make during an already difficult transition.
The goal of self storage during this period isn’t to delay the inevitable. It’s to create the conditions where good decisions can actually happen: space, time, and the absence of daily pressure from objects that carry complicated histories.
Store what you’re not ready to decide about. Keep what you genuinely need access to. Protect what’s irreplaceable. And give yourself permission to sort through the rest when you’re ready — not when the chaos of the initial separation demands it.
If you’re navigating a life transition and need flexible, month-to-month storage in Central Idaho, Elk Country Storage Co. has units available in Kamiah and Kooskia. You can reserve online or reach us directly at (208) 630-3753.
Have a question about storage during divorce or separation? Leave a comment below, share this guide with someone who might need it, or explore our other moving and downsizing resources to help you through this transition.
]]>Knowing how to downsize before a move is one of the highest-leverage skills in the relocation process. Done well, it cuts your moving costs, shortens your packing time, reduces your stress, and allows you to arrive in your new home with belongings that actually fit the life you’re moving toward — not the life you’re leaving behind. Done poorly — or skipped entirely — it means you pay to move things you don’t want, unpack them into a smaller space, and deal with the clutter on the other end anyway.
This guide walks through the complete downsizing process: what it means, how to start, what to keep versus sell versus donate versus store, how to work through every room systematically, how to handle the emotionally loaded items without regret, and the mistakes that derail most people’s attempts. By the end, you’ll have a clear, practical framework for getting it done.
What Does It Mean to Downsize Before a Move?
Downsizing before a move means deliberately reducing the volume of your household belongings before packing begins — keeping only what earns its place in your new home and finding appropriate outcomes for everything else.
It’s different from packing. Packing is moving everything from one place to another. Downsizing is deciding, first, what actually deserves to make that journey — and what shouldn’t.
The word “downsize” is often associated with moving to a smaller home, but the principle applies to any move. Even if your new home is larger, arriving with fewer things means arriving with more intentionality. You get to set up your new space rather than recreating the accumulated chaos of your previous one.
The benefits are both practical and psychological. Practically: fewer items means a smaller moving truck, less packing material, fewer hours of loading and unloading, and lower moving costs. Psychologically: there is a genuine lightness that comes with releasing belongings that were never really yours anymore — they were just inertia.
Why Should You Downsize Before Moving?
Downsizing before moving saves money, reduces the physical and logistical complexity of the move, and makes the setup of your new home faster and more satisfying.
Every item you don’t move is an item you don’t pack, don’t load, don’t transport, don’t unload, and don’t find a place for in a new space. On a cost-per-pound basis for professional movers, or in hours of labor for a self-managed move, that math adds up quickly.
| Benefit | Impact on Your Move |
|---|---|
| Reduced costs | Fewer boxes, smaller truck, less labor — meaningful savings on any move |
| Faster packing | Less to sort and box means pack time drops significantly |
| Less stress | Decisions made in advance under low pressure beat crisis decisions on moving day |
| Better organization | A downsized home sets up faster — every item has a place because you chose each item |
| Cleaner staging for sale | Decluttered homes photograph better, show better, and sell faster |
| Fresh start | Arriving with only what you want is qualitatively different from arriving with everything you had |
There’s also a practical advantage for home sellers specifically. Real estate agents consistently advise clients to declutter before listing — and for good reason. Homes that show clean and uncluttered allow buyers to see the space, not the stuff. A storage unit in the weeks before listing lets you stage properly without permanently parting with anything.
How Do You Start Downsizing Before a Move?
Start downsizing as early as possible — ideally eight to twelve weeks before your move date — beginning with the spaces that accumulate the most over time: the garage, attic, basement, and spare rooms.
The biggest mistake in downsizing is starting too late, under too much time pressure to make thoughtful decisions. Rushed downsizing produces two bad outcomes: keeping too much (because there’s no time to figure out what to do with things) or giving away things you’ll later regret (because the deadline forced premature decisions). Starting early gives every category the time it deserves.
How Do You Create a Home Inventory?
A home inventory is a room-by-room record of what you own — it makes the downsizing process concrete rather than abstract and prevents the “I’ll deal with that later” avoidance that stalls most efforts.
You don’t need a spreadsheet. Walk each room with your phone and take photographs or video. Note what’s in each closet, cabinet, and storage area. The act of documenting forces a confrontation with what you actually have — and often reveals items you’d genuinely forgotten, which makes sorting them far easier.
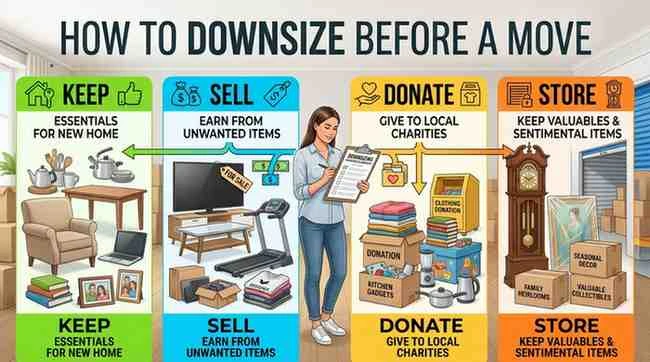
What Is the Keep, Sell, Donate, or Store Method?
The Keep, Sell, Donate, or Store method assigns every item in your home to one of four categories — eliminating the ambiguous “maybe” pile that derails most decluttering attempts.
- Keep: Items going to your new home. Test each one: does it have a specific place and purpose there?
- Sell: Functional items with resale value. Set a realistic price and a firm deadline — if it doesn’t sell in two weeks, donate it.
- Donate: Functional items without strong resale value, or items where the sale effort isn’t worth the return.
- Store: Items that aren’t moving with you yet but aren’t ready to leave your life — sentimental belongings, seasonal items, furniture for a future room.
The power of this framework is that every item gets a decision. Nothing goes in a box labeled “miscellaneous” and moves to the back of a closet in the new home.
What Is the One-Year Rule for Decluttering?
The one-year rule: if you haven’t used an item in the past twelve months and it isn’t seasonal, sentimental, or a genuine safety backup — sell or donate it.
This rule cuts through the “I might need it someday” justification that fills most people’s garages and spare rooms with things they’ll never actually use. It’s not perfect — there are legitimate exceptions — but applied honestly, it’s the single most efficient filter for reducing household volume.

How Do You Set a Downsizing Timeline?
Build your downsizing timeline backward from your move date:
- 8–12 weeks out: Start with low-urgency accumulation spaces — garage, attic, basement, storage rooms
- 6–8 weeks out: Work through main living areas, bedrooms, and home office
- 4–6 weeks out: Begin selling listed items; schedule donation pickups; arrange storage unit if needed
- 2–4 weeks out: Final decisions on remaining items; begin packing keeps
What Should You Keep When Downsizing?
Keep items that are regularly used, have a specific place in your new home, are genuinely irreplaceable, or serve a clear functional purpose in your current stage of life.
The question to ask for every item is not “is this worth keeping?” but “does this earn a place in my next home?” The framing difference matters. The first question invites nostalgia and justification. The second invites clarity.
Keep without question:
- Essential daily-use items across kitchen, bathroom, bedroom, and living areas
- Important documents: tax records, legal documents, property records, medical records, vital documents — these travel with you, not in a moving box
- Furniture that fits your new floor plan and serves your actual lifestyle
- Tools and equipment you use regularly
- Items of genuine irreplaceable value — sentimental or financial
Keep with scrutiny:
- Furniture that “might” work in the new space — if it doesn’t have a clear home there, it probably doesn’t belong
- Collections — a curated collection of what you love versus a complete collection of everything you’ve accumulated
- Clothing — keep what fits, what you wear, and what matches your actual current life
What Should You Sell Before Moving?
Sell items that are functional, in good condition, and have realistic resale value — setting a firm price and a two-week sales window before defaulting to donation.
The goal of selling is recovery of value, not maximization of value. Spending three hours managing a $40 sale is rarely worth it when the same time could be spent on the move itself. Price items to sell, not to hold.
Items with the strongest resale value:
- Furniture in good condition — sofas, dining sets, bedroom furniture, shelving
- Large appliances not moving with you — washers, dryers, refrigerators, chest freezers
- Electronics in good working condition — televisions, audio equipment, gaming systems
- Bicycles, sporting goods, and fitness equipment
- Power tools and equipment
- Collectibles and antiques — these may warrant a specialist rather than a general marketplace
Where to sell:
- Facebook Marketplace for local pickup on furniture and large items — no shipping logistics
- Craigslist for the same category with a slightly different buyer demographic
- eBay for collectibles, electronics, and items with a national buyer pool
- Estate sale companies if you’re clearing an entire home — they handle everything for a percentage
Set a hard deadline. Items that haven’t sold in two weeks go to donation. A donated item is better than an item that moves with you because you ran out of time to sell it.
What Should You Donate Before a Move?
Donate functional items in Idaho that don’t have strong resale value or where the effort of selling outweighs the return — prioritizing donation options that can arrange pickup rather than requiring you to transport items.
Donation works best for: clothing and shoes, kitchen goods and small appliances, books, linens and towels, children’s toys and games, and household décor.
Donation options that reduce your logistics burden:
- Habitat for Humanity ReStores accept furniture and building materials and can arrange pickup for larger items
- Goodwill and Salvation Army have pickup programs for qualifying loads
- Local shelters and transitional housing programs often accept furniture, kitchenware, and household goods directly
- Buy Nothing groups and local Facebook groups can move items quickly and locally without any transport on your part
Schedule donation pickups early — pickup calendars fill up, especially in spring and early fall when moving season peaks. Don’t let donated items sit in your home waiting for a pickup date that’s two weeks away.
What Items Should You Store Instead of Getting Rid Of?
Store items you’re not ready to part with permanently but don’t need immediately in your new home — sentimental belongings, seasonal items, furniture for a future room, and items in a genuine holding pattern.
The store category is the category most people skip — and it’s the one that leads to the most post-move regret. When someone gives away something they later wish they’d kept, it’s almost always because “donate” and “store” weren’t genuinely separated as options. Storage gives you the time to make better decisions.

When Is a Storage Unit a Smart Choice During a Move?
A storage unit is smart during a move when you have items that don’t fit your immediate new home but aren’t ready to leave your life, when your move involves a timing gap, or when you need to stage your current home without permanently parting with anything.
Common scenarios where storage adds genuine value:
- Staging a home for sale: Move excess furniture and personal items into storage so the home shows clean. This is one of the highest-return uses of temporary storage — homes that show well sell faster.
- Timing gaps: Between when you leave one home and when you’re settled in the next. Almost every move involves a gap; a storage unit makes it manageable.
- Furniture for a future room: You’re moving into a two-bedroom but you own a three-bedroom’s worth of furniture. The third bedroom furniture stores until you need it — or until you decide you don’t.
- Sentimental items needing more time: Storage gives you six months to revisit a decision rather than making it in thirty seconds on a moving day deadline.
What Are the Benefits of Self Storage During a Move?
Self storage during a move provides flexibility that the move itself cannot offer. With a month-to-month storage unit requiring no long-term commitment, you pay only for the months you actually need the space. With no deposit required, starting a unit doesn’t add financial pressure to an already expensive transition. And with 24/7 gate access, you can retrieve items whenever your new home is ready for them — not on a facility’s schedule.
For a practical framework on using storage as part of a move, our complete guide on short-term self storage when moving covers the specific logistics of staging belongings in phases and using storage to reduce the pressure of tight moving timelines.
How Can You Downsize Room by Room?
A room-by-room approach — completing one space before starting the next — prevents the whole-house overwhelm that stalls most downsizing efforts. Start with low-emotional-charge spaces and work toward high-charge ones.
Room-by-Room Downsizing Checklist
Garage:
- [ ] Sort all tools — keep what you use, sell quality duplicates, discard broken items
- [ ] Assess all sports and recreational equipment against actual use in the past year
- [ ] Discard or donate seasonal items that are worn out or no longer used
- [ ] Properly dispose of hazardous materials — paint, solvents, pesticides
- [ ] Sell or store large equipment with no immediate home in the new space
Kitchen:
- [ ] Pull everything from every cabinet and drawer before sorting back in
- [ ] Eliminate duplicates — keep one of most tools, two at most for high-use items
- [ ] Donate specialty appliances used fewer than three times per year
- [ ] Discard expired pantry goods; donate unexpired non-perishables
- [ ] Assess serving and entertaining pieces honestly against your actual social life
Bedrooms:
- [ ] Pull all clothing out — sort by what fits, what you’ve worn in twelve months, what represents your actual life now
- [ ] Clear under-bed storage completely and sort everything found there
- [ ] Assess furniture against the floor plan of the new home
- [ ] Sort all dresser and nightstand drawers
Living Room:
- [ ] Apply one-year rule to books, media, and décor
- [ ] Assess all furniture against the new space — measure before deciding
- [ ] Evaluate electronics: what actually gets used versus what gets maintained out of habit
Home Office:
- [ ] Shred or recycle documents beyond their retention period
- [ ] Keep: tax records (seven years), legal documents, property records, medical records
- [ ] Test all electronics before deciding to move them
- [ ] Go through the cable drawer — discard all cables for devices you no longer own
Attic / Basement / Storage Rooms:
- [ ] These spaces most benefit from the one-year rule — items stored out of sight are usually stored out of use
- [ ] Sort seasonal decorations honestly — a curated set of what you love, not everything accumulated
- [ ] Assess any furniture or large items stored here against the new home’s actual floor plan
How Do You Handle Sentimental Items Without Regret?
The key to handling sentimental items during a downsize is separating time pressure from the decision itself — using storage to give yourself weeks or months to decide rather than hours on a moving deadline.
Sentimental items are the category where downsizing most commonly produces regret — not because people should have kept more, but because they made permanent decisions under temporary time pressure. The solution is not to avoid downsizing sentimental items; it’s to give those items the time the decision deserves.
Practical strategies:
Digitize where possible. Photographs, documents, letters, and children’s artwork can be scanned at high resolution and preserved digitally while the physical originals are donated or discarded. This is particularly valuable for paper items that occupy space but whose value is entirely in their content.
Keep the best, not all. If you have a collection of items that represents the same memory — thirty pieces of children’s artwork from kindergarten through fifth grade — keep the ten that genuinely move you and let the others go. The memory doesn’t require the entire archive.
Use storage as a decision buffer. Place items you’re uncertain about in a storage unit with a review date six months out. When you revisit them — without the emotional charge of a move in progress — the decisions often become clearer. Items you can’t remember storing after six months rarely needed keeping.
Involve the people the items are connected to. Children’s toys, family heirlooms, and items with shared meaning sometimes belong with other family members. Passing them forward is often a better outcome than storage and a better outcome than discarding.
What Are the Most Common Downsizing Mistakes to Avoid?
| Mistake | Better Alternative |
|---|---|
| Waiting too long to start | Begin 8–12 weeks before move date, not the week before |
| Keeping too much out of obligation | Apply the one-year rule; keep what you choose, not what you feel guilty releasing |
| Rushing decisions on sentimental items | Use storage as a time buffer — make permanent decisions without artificial deadlines |
| Ignoring the storage option | Storage bridges the gap between “not ready to decide” and “it’s gone forever” |
| Pricing items too high to sell | Price to sell in two weeks; donate anything that doesn’t move |
| Packing first, sorting later | Sort before a single box is packed — packing undecluttered belongings is the core mistake |
| Not measuring furniture against the new floor plan | Measure your new space before deciding what furniture to move |
| Keeping duplicates “just in case” | One of most items is sufficient; the one-year rule handles the rest |
What Is a Complete Downsizing Checklist Before a Move?
8–12 Weeks Before the Move
- Walk every room and storage area with your phone — photograph and inventory what you have
- Confirm your new home’s floor plan and measurements — know what fits before deciding what to keep
- Set up four physical sorting zones: Keep, Sell, Donate, Store
- Start with low-emotional-charge spaces: garage, attic, basement, spare rooms
- Research donation pickup options in your area and schedule early
6–8 Weeks Before 6. List items for sale — set prices, take clear photos, post on relevant platforms 7. Schedule donation pickups for items not going to individual buyers 8. Arrange storage unit for items going into the Store category 9. Work through main living areas, bedrooms, and home office 10. Digitize photographs, documents, and other paper items you’re keeping for content but not physical form
4–6 Weeks Before 11. Follow up on sales; donate any items not sold within two weeks 12. Move Store-category items into storage unit 13. Begin packing Keep items in non-essential rooms first 14. Confirm moving truck or company reservation
2–4 Weeks Before 15. Final pass through all rooms — apply the one-year rule to anything still undecided 16. Pack remaining Keep items; leave only daily-use essentials unpacked 17. Confirm storage unit is organized for easy retrieval after the move
What Does Downsizing Before a Move Look Like in Practice?
Consider a realistic scenario: a couple in their late fifties whose children have moved out are selling a four-bedroom home and moving into a two-bedroom condominium in a nearby city. They’ve lived in the home for twenty-two years.
The challenge: Twenty-two years of accumulated belongings, a furnished guest room that will no longer exist, a garage full of tools and sporting equipment from a family of four, and a basement holding items from three generations of family history.
The approach: They start ten weeks before the move. The basement gets the first two weekends. A combination of family distribution — children taking items that belong to their life stages — and a ruthless one-year rule reduces the basement from packed to manageable. An estate sale company handles the furniture, tools, and household goods in a single weekend.
Storage decisions: A 10×10 unit holds the items that didn’t find homes through the estate sale but that they’re not ready to discard — two pieces of heirloom furniture without a place in the new condo, a collection of art prints that need wall space they won’t have, and three boxes of family photographs requiring proper organization. The plan is to revisit in six months with the decisions removed from the pressure of the move.
Outcome: They arrive at the condo with furniture that fits, boxes they’re genuinely glad to unpack, and a clean start that would have been impossible had they packed first and sorted later. The storage unit gets visited four months later — one heirloom piece goes to a grandchild, one piece finds a corner of the condo they’d underestimated, and the photographs finally get the afternoon of organization they’d needed for years.
Frequently Asked Questions: How to Downsize Before a Move

How do you downsize before a move? Start eight to twelve weeks before your move date. Walk every room, inventory what you have, and sort everything into four categories: Keep, Sell, Donate, or Store. Apply the one-year rule to most items. Move store-category items into a storage unit so they’re out of the way without being permanently gone. Pack only your Keep items.
What is the first step in downsizing a home? The first step is creating a home inventory — walking every room, closet, and storage space with your phone to document what you have. This makes the scale of the task concrete and prevents the avoidance that keeps most people from starting.
What should I keep when downsizing? Keep items you use regularly, items that have a specific place in your new home, genuinely irreplaceable sentimental items, and important documents. Apply the question “does this earn a place in my next home?” rather than “is this worth keeping?”
What should I sell before moving? Furniture in good condition, large appliances not moving with you, electronics, sporting equipment, tools, and collectibles. Use Facebook Marketplace and Craigslist for local pickup items. Set a two-week sell window — items that haven’t sold get donated.
Should I rent a storage unit when downsizing? Yes, in most cases. A storage unit separates the “not ready to decide” category from permanent decisions, bridges the timing gap in almost every move, and allows you to stage your current home without giving things away permanently. Month-to-month storage with no deposit is built exactly for this.
How do I declutter before moving without regret? Use storage as a buffer for items you’re uncertain about — give yourself six months to revisit the decision rather than making it on a moving day deadline. Digitize what can be digitized. Involve family in decisions about shared items. Keep the best of each category, not all of it.
How far in advance should I start downsizing? Eight to twelve weeks before your move date is the practical minimum. Starting earlier is almost always better — rushed downsizing produces the most regret and the most wasted money on moving things you didn’t actually want.
What is the one-year rule for decluttering? If you haven’t used an item in the past twelve months and it isn’t seasonal, sentimental, or a genuine safety backup — sell or donate it. Applied honestly, this single rule eliminates most of the accumulation in any household.
How can downsizing reduce moving costs? Every item not moved is an item not packed, loaded, transported, and unloaded. Professional movers price by weight and volume — a meaningfully lighter, smaller load costs measurably less. Even for self-managed moves, fewer items means fewer trips and a smaller truck.
What should I do with sentimental items when downsizing? Give them time rather than pressure. Use a storage unit as a decision buffer — items you’re uncertain about go into storage with a review date, allowing you to make the decision without the emotional charge of a move in progress. Digitize where the value is in content rather than the physical object. Keep the best examples, not the complete collection.
Final Thoughts on How to Downsize Before a Move
The fundamental insight behind knowing how to downsize before a move is this: the decisions you make about your belongings before packing begins determine nearly everything about how the move feels and how well your new home functions.
Every item that doesn’t make the journey is one you don’t pack, move, unload, or find a place for. Every item that arrives in your new home should be there because you chose it — not because you ran out of time to decide otherwise. That distinction is the difference between a fresh start and a relocated version of the same accumulated weight.
The process works when you start early, apply a consistent sorting framework, use storage as a legitimate option rather than a form of avoidance, and give sentimental items the time they deserve rather than the thirty seconds they get on a moving day deadline.
If you’re in the middle of a downsize or preparing for one, our room-by-room decluttering checklist gives you a parallel framework for the room-by-room approach, and the moving to Idaho guide covers the relocation planning side for anyone making the move to the Clearwater Valley.
Share this guide with anyone navigating a downsize — and explore storage options in Kamiah and Kooskia if you need a secure, flexible holding space during your transition.
 Elk Country Storage Co.: (208) 630-3753
  Reserve a unit: elkcountrystorageco.com/reserve
Related Resources from Elk Country Storage Co.:
- Short-Term Self Storage When Moving — Using storage to bridge your move
- Month-to-Month Storage — Flexible terms for the store category during a downsize
- No-Deposit Storage — Start your downsizing storage unit without upfront cost
- Decluttering Before a Move: Room-by-Room Checklist — A parallel systematic framework for every room
- Moving to Idaho: What to Know Before You Move — Relocation planning for Clearwater Valley newcomers
Kamiah is a place people choose deliberately. Quiet, close-knit, surrounded by the Clearwater River country — it’s the kind of community that earns deep loyalty from the people who settle there. But life changes. Jobs change. Families grow. Healthcare needs evolve. And for many Kamiah residents, the moment eventually comes when Lewiston — Idaho’s second-largest city, just over an hour down US-12 — starts to make practical sense.
Moving from Kamiah to Lewiston Idaho is one of the most common within-region relocations in North Central Idaho, and for good reason. Lewiston offers employment across multiple industries, full-service healthcare, a broader range of housing options, quality schools, and the kind of commercial infrastructure that simply isn’t available in smaller Clearwater Valley communities. At the same time, it sits at the confluence of the Snake and Clearwater Rivers — so the outdoor access that defines life in this part of Idaho doesn’t go away when you cross the county line.
This guide covers everything you need to know before making the move: how the two communities compare on cost, what Lewiston’s neighborhoods look like, where the employment opportunities are, what the schools and healthcare situation is, and how to plan the logistics of the relocation itself from start to finish.
Why Are People Moving from Kamiah to Lewiston Idaho?
The most common reasons Kamiah-area residents relocate to Lewiston are employment opportunities, access to expanded healthcare services, housing variety, and proximity to a broader range of commercial and educational resources.
Lewiston, the seat of Nez Perce County and the population center of the Lewis-Clark Valley, has an economic footprint significantly larger than anything available in the smaller Clearwater Valley communities. For residents who’ve outgrown what rural central Idaho can offer professionally, Lewiston is typically the nearest city with a meaningful job market.
The healthcare factor is significant and underappreciated. Kamiah and Kooskia have clinic-level services, but serious medical needs — specialist care, surgical services, diagnostic imaging, oncology, cardiology — require a trip to Lewiston. For retirees, families with health considerations, or anyone for whom healthcare proximity is a priority, the commute gets old fast.
Housing variety is another driver. Kamiah’s housing inventory is limited and often older. Lewiston offers a broader range of property types, price points, neighborhoods, and new construction — giving buyers more options to match their budget and lifestyle.
Finally, for families with school-age children, Lewiston’s school district offers more programs, facilities, and extracurricular depth than smaller rural districts — an increasingly important consideration for families prioritizing education.
How Does the Cost of Living Compare Between Kamiah and Lewiston?
Lewiston is modestly more expensive than Kamiah across most cost-of-living categories, with housing being the most notable difference — though Lewiston remains significantly more affordable than Boise, Coeur d’Alene, and most Pacific Coast cities.
| Category | Kamiah, ID | Lewiston, ID | Notes |
|---|---|---|---|
| Median home price | Lower — limited inventory, older stock | Moderate — broader range, more options | Both below Idaho’s statewide average |
| Utilities | Similar to Lewiston | Moderate | Lewiston slightly higher due to larger homes |
| Groceries | Limited options, some price premium | More competitive — full grocery market | Lewiston’s larger market base drives more options |
| Transportation | Lower (rural distances, less traffic) | Slightly higher (more urban, more vehicle use) | Fuel costs similar; Lewiston has more commute variability |
| Property taxes | Lewis County rates apply | Nez Perce County rates apply | Both competitive by Idaho standards |
| Healthcare costs | Limited local access — travel required | Full-service access locally | Lewiston significantly reduces healthcare travel cost |
The practical cost comparison often favors Lewiston more than the raw numbers suggest, because the cost of traveling to Lewiston for healthcare, specialty shopping, and services from Kamiah adds up significantly over time. Many Kamiah residents already make weekly or bi-weekly Lewiston trips — and the cost of those trips is invisible in a direct comparison but real in a monthly budget.
What Is It Like Living in Lewiston Idaho?
Lewiston offers a genuine small-city lifestyle at the confluence of two major river systems — urban enough for convenience and full services, small enough to retain community character and outdoor access.
Lewiston’s population sits in the 33,000–35,000 range, making it Idaho’s second-largest city by some measures. It shares the Lewis-Clark Valley with Clarkston, Washington, directly across the Snake River, and the combined metro population is closer to 60,000 — enough to support a genuine commercial and cultural infrastructure.
Climate: Lewiston sits in a river valley at a relatively low elevation — around 740 feet — which gives it one of the mildest climates in Idaho. Winters are notably warmer than Kamiah and the Clearwater Valley, with less snow accumulation and shorter hard-freeze periods. For Kamiah residents tired of long winters, this is often a positive surprise.
Community atmosphere: Lewiston has the feel of a working river town that has grown without losing its identity. It’s a place where people know their neighbors, local businesses still compete effectively, and civic pride is genuine. The transition from Kamiah’s smaller, more rural community culture takes some adjustment — but most transplants from the Clearwater Valley find Lewiston feels more like a larger version of what they know than a fundamentally different kind of place.
Recreation: The Snake and Clearwater Rivers converge at Lewiston’s doorstep. Fishing, boating, jet skiing, and whitewater access are all immediately available. The valley walls rise steeply above the city, offering hiking and trail access minutes from the edge of town. The outdoor culture that defines North Central Idaho doesn’t diminish in Lewiston — it expands in some directions.
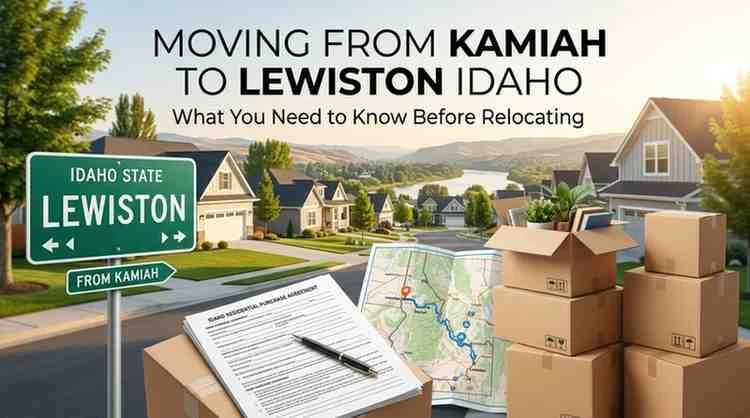
What Are the Best Neighborhoods in Lewiston for New Residents?
Lewiston’s neighborhoods range from established historic areas near the river to newer developments on the Lewiston Orchards plateau above the valley — each with different characters, price points, and practical attributes.
What Neighborhoods Work Best for Families?
The Lewiston Orchards area — the plateau above the valley floor — is generally considered the most family-oriented part of greater Lewiston. It offers newer housing stock, proximity to schools, more yard space, and a suburban character that suits families with children. The tradeoff is a longer commute down into the valley for work and shopping, though the drive is typically 10–15 minutes.
The Bryden Canyon area also attracts families, with good school proximity and established neighborhoods that have maintained their character over time.
What Neighborhoods Suit Retirees?
Retirees often prefer the lower valley neighborhoods closer to the river — established areas with walkable proximity to downtown, medical facilities, and the waterfront. Lower-maintenance housing options, including condominiums and smaller single-family homes, are more concentrated in these areas than on the plateau.
Where Are Schools and Shopping Most Accessible?
The Orchards area has the best proximity to grocery stores, retail, and Lewiston’s main commercial corridor, while valley-floor neighborhoods have easier access to the downtown core, medical facilities, and the river. Most Lewiston residents find either area has acceptable access to both.
Where Are the Most Affordable Housing Options?
The older established neighborhoods on the valley floor — away from waterfront premium areas — tend to offer the most affordable entry points into Lewiston’s housing market. Older home stock requires more maintenance consideration, but purchase prices are often meaningfully lower than comparable homes on the plateau.
What Employment Opportunities Are Available in Lewiston?
Lewiston’s economy is more diversified than most North Central Idaho communities, with significant employment in manufacturing, healthcare, education, transportation, and retail — making it a realistic destination for professional relocation from smaller Clearwater Valley communities.
Manufacturing: Clearwater Paper (one of the region’s largest employers), food processing, and metal fabrication provide a substantial blue-collar employment base. These industries offer stable, often well-compensated positions that don’t exist at comparable scale in the Clearwater Valley.
Healthcare: St. Joseph Regional Medical Center is the major regional healthcare employer and one of Lewiston’s largest private-sector employers. Healthcare employment spans physicians, nursing, allied health professionals, and administrative roles.
Education: Lewis-Clark State College is a four-year institution providing academic employment and supporting a student population that drives related local business. The Lewiston School District is also a significant employer.
Transportation and logistics: Lewiston’s position as the furthest inland seaport in the Pacific Northwest — accessible via the Snake River navigation channel — supports ongoing transportation and logistics employment.
Small business: Lewiston’s commercial base supports a healthy small-business environment across retail, food service, construction, professional services, and trades — opportunities that don’t require large-employer hiring cycles.
How Good Are the Schools in Lewiston Idaho?
Lewiston’s public school system, operated by Lewiston Independent School District, offers more program variety, facilities, and extracurricular depth than smaller rural Idaho districts — a meaningful consideration for families making the move from Kamiah.
Lewiston High School is the district’s flagship, offering Advanced Placement programs, vocational training through the Career Technical Education pathway, athletics across a full range of sports, and arts programming. For families whose children are approaching high school, the program breadth at LHS is often cited as a primary relocation driver.
The district operates multiple elementary and middle school campuses serving different parts of the city — families in the Orchards area and valley floor neighborhoods will each have nearby options.
Lewis-Clark State College provides higher education access locally — a meaningful consideration for families with college-bound students who want an in-state option within commuting distance of home.
Private schooling options also exist in Lewiston, though the public school system is the primary choice for most families.
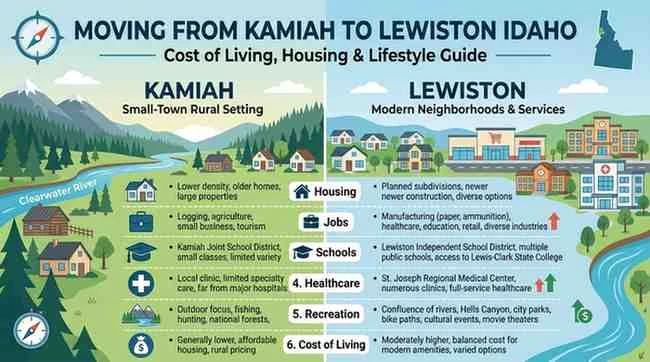
What Healthcare Services Are Available in Lewiston?
Lewiston provides full-service regional healthcare through St. Joseph Regional Medical Center — the primary hospital serving North Central Idaho — along with a range of specialist clinics, urgent care facilities, dental practices, and outpatient services.
For Kamiah and Clearwater Valley residents who currently travel to Lewiston for any significant healthcare need, living in Lewiston eliminates that travel entirely. The practical healthcare quality-of-life improvement is one of the most frequently cited benefits among Clearwater Valley transplants to Lewiston.
St. Joseph Regional Medical Center provides emergency services, surgical care, cardiac services, oncology, labor and delivery, imaging, and a range of specialty clinics. The healthcare ecosystem around the hospital includes independent specialist practices, physical therapy, behavioral health services, and primary care.
For retirees specifically, proximity to full-service healthcare is often the single most important factor in the relocation decision — and Lewiston delivers on it.
What Outdoor Activities and Recreation Does Lewiston Offer?
Lewiston’s outdoor recreation calendar is defined by the Snake and Clearwater Rivers — two of Idaho’s most storied fisheries converge at the city’s front door, and the valley walls above provide hiking, trail access, and views that few comparably sized cities can match.
Fishing: The Clearwater River below Lewiston is legendary for steelhead and salmon. The Snake River system offers additional salmon, steelhead, and bass fishing. For Kamiah-area residents who already fish these systems, Lewiston puts you at the mouth of the drainage — not hours from it.
Boating and water recreation: Jet boats, fishing boats, and recreational watercraft operate extensively on both rivers throughout the season. Hell’s Canyon — the deepest river gorge in North America — is accessible by jet boat from the Lewiston–Clarkston area.
Hiking: The Lewiston Levee Parkway provides riverside trail access in the valley. The Lewiston Hill area above the city offers steeper terrain and broader views. Natural areas surrounding the valley provide trail access within minutes of the city.
Hunting: Idaho County’s exceptional hunting grounds are still within reasonable reach from Lewiston — the drive is longer than from Kamiah, but the Lewis-Clark Valley itself and the surrounding draws offer upland birds and some deer hunting close to home.
What Challenges Should You Consider Before Moving?
The move from Kamiah to Lewiston brings real benefits, but the transition from small-town rural life to a regional city involves genuine adjustments that are worth understanding before you commit.
| Factor | Kamiah | Lewiston | Consideration |
|---|---|---|---|
| Community size | ~1,300 residents | ~33,000 residents | Adjustment period for social dynamics |
| Traffic | Minimal | Moderate city traffic | Not severe by Idaho standards, but different |
| Housing competition | Limited inventory, less competition | More options, more buyer competition | Pre-approval and preparation matters more |
| Winter severity | Harder winters, more snow | Milder — lower elevation, less accumulation | Typically a positive adjustment |
| Cost of living | Lower overall | Modestly higher | Offset by reduced travel costs and more local access |
| Pace of life | Rural, slower | Small-city cadence | Takes adjustment for some rural residents |
| Community familiarity | Deep, multi-generational ties | Takes more time to build | Social investment required early |
The biggest adjustment is typically the social one — not the cost or the logistics, but the transition from a community where everyone knows everyone to one where you’re starting fresh. Most Clearwater Valley transplants find that Lewiston’s community is genuinely welcoming, but it requires active investment in ways that a small town like Kamiah doesn’t demand.
How Can You Prepare for a Smooth Move from Kamiah to Lewiston?
A well-prepared relocation from Kamiah to Lewiston takes two to four months of lead time — starting with housing and employment planning, working through logistics, and building in flexibility for the timeline variability that Idaho’s housing market creates.
Moving Checklist: Kamiah to Lewiston
3–4 months before:
- [ ] Establish your housing budget and get mortgage pre-approval if buying
- [ ] Research Lewiston neighborhoods against your school, commute, and lifestyle priorities
- [ ] Begin employment transition planning if not already secured
- [ ] Research Lewiston school enrollment requirements if applicable
- [ ] Arrange a storage unit in Kamiah or the Lewiston area to manage the transition gap
6–8 weeks before:
- [ ] Sign purchase agreement or rental lease
- [ ] Schedule utilities disconnection at origin and connection at destination
- [ ] File change of address with USPS; notify financial institutions, insurance providers, and all recurring services
- [ ] Arrange moving truck or moving company for the Kamiah–Lewiston corridor
- [ ] Begin decluttering — the move is the natural reset point for what you’re bringing forward
2–4 weeks before:
- [ ] Pack non-essential rooms first; keep daily-use items accessible until the last week
- [ ] Confirm school enrollment if applicable
- [ ] Transfer Idaho vehicle registration if changing counties
- [ ] Confirm moving storage unit reservation
Move week:
- [ ] Pack essentials bag with medications, documents, chargers, and items needed in the first 24 hours in the new home
- [ ] Do a final walkthrough of the Kamiah property before departure
- [ ] Transfer keys and complete any final property obligations
For the storage side of the Kamiah-to-Lewiston move, Elk Country Storage Co. serves both ends of the corridor — with locations in Kamiah and Kooskia for month-to-month, no-deposit units that bridge the gap between when you leave your Kamiah home and when you’re fully settled in Lewiston. Our complete guide on short-term self storage when moving covers exactly how to use storage to reduce the pressure of a tight moving timeline.
If you’re decluttering before the move — which is always worth doing — the room-by-room decluttering checklist provides a systematic framework for sorting what moves with you, what goes into storage, and what gets left behind.
What Does a Kamiah-to-Lewiston Relocation Actually Look Like?
Consider a realistic scenario: a family of four in Kamiah — two working adults, two school-age children — decides to relocate to Lewiston after one parent is offered a position at a Lewiston healthcare facility. The other parent works remotely and can operate from anywhere.

Housing search: They start house hunting three months before the target move date, working with a Lewiston area agent who focuses their search on the Orchards area for school proximity and yard space. After two offers that weren’t accepted, they secure a three-bedroom home on the plateau — newer construction, larger than their Kamiah home, at a purchase price modestly higher but offset by eliminating a long daily commute.
Schools: Their two children enroll in the Orchards-area elementary school and Lewiston Middle School. The transition takes a semester — new friends, new routines, new teachers — but by spring both kids have found their footing.
The move itself: The timing gap between their Kamiah closing date and the Lewiston closing creates a two-week window where their household contents need somewhere to go. A 10×15 unit at Elk Country Storage Co.’s Kamiah location bridges that gap cleanly — no deposit, no contract beyond the two months they actually need.
Outcome: A year into Lewiston, the family reflects that the things they miss about Kamiah — the specific community, the river access right outside town, the familiarity — are real. But the things that drove the move — healthcare proximity for a parent managing a chronic condition, broader school options, and professional opportunity — have delivered what they hoped. They drive back to the Clearwater Valley several times a year. The roots don’t disappear.
Frequently Asked Questions: Moving from Kamiah to Lewiston Idaho
Is Lewiston Idaho a good place to live? For most people making the move from smaller rural communities, yes. Lewiston offers a genuine quality of life combining outdoor recreation, community character, full-service healthcare, employment diversity, and affordable housing relative to larger Idaho cities. The mild climate compared to higher-elevation Idaho communities is an additional benefit many residents didn’t fully anticipate.
How far is Kamiah from Lewiston? Kamiah is approximately 60 miles from Lewiston via US-12, a scenic river highway that runs roughly one hour under normal conditions. It’s a practical commute for some people, but the majority of residents who move to Lewiston are doing so precisely because they want to reduce that distance to zero.
Is Lewiston more affordable than other Idaho cities? Yes, significantly. Lewiston’s housing costs are well below Boise, Coeur d’Alene, and Sun Valley, and modestly above small rural communities like Kamiah. It’s one of Idaho’s more affordable mid-size cities for home purchase and general cost of living.
What jobs are available in Lewiston? Manufacturing (Clearwater Paper and others), healthcare (St. Joseph Regional Medical Center), education (Lewis-Clark State College, Lewiston School District), transportation and logistics, construction, retail, and small business across all service categories.
Are Lewiston schools good? Lewiston Independent School District is a solid public school system with more program variety than rural Idaho districts. Lewiston High School’s AP programs, CTE vocational pathway, and athletics are particularly well-regarded. Lewis-Clark State College provides a local higher education option.
What is the weather like in Lewiston? Lewiston has one of Idaho’s milder climates due to its low-elevation river valley location. Winters are shorter and less severe than Kamiah and most of North Central Idaho. Summers are hot — consistently above 90°F in July and August. The mild winter is often cited as a positive surprise by Clearwater Valley transplants.
What are the best neighborhoods in Lewiston? The Lewiston Orchards area suits families prioritizing newer homes, school proximity, and suburban character. Valley floor neighborhoods near the river suit retirees and those who prefer proximity to downtown and medical facilities. Affordable options exist throughout older established valley-floor neighborhoods.
How much does it cost to move from Kamiah to Lewiston? A local move of approximately 60 miles with a full household load typically runs $1,500–$4,000 with a moving company, depending on home size and services needed. DIY with a rental truck runs significantly less. Storage costs during the transition depend on unit size and duration.
Is Lewiston good for retirees? Very. Lewiston combines mild winters, full healthcare access, outdoor recreation, affordable housing, and a genuine community character that serves retirees well. Many retiring Clearwater Valley residents specifically choose Lewiston for healthcare proximity as their primary motivation.
What should I know before relocating to Lewiston? Understand the community adjustment — Lewiston is friendly but building social connections takes more active effort than in a small town. Get mortgage pre-approval early if buying. Research school zones against your specific address before purchasing. And plan your storage logistics for the transition gap — it almost always takes longer than expected.
Final Thoughts on Moving from Kamiah to Lewiston Idaho
Moving from Kamiah to Lewiston Idaho is one of the more common and sensible within-region relocations in North Central Idaho — and for good reason. Lewiston delivers on the things that most motivate the move: employment opportunity, healthcare proximity, housing variety, educational depth, and the kind of small-city livability that doesn’t require giving up the outdoor culture that made the Clearwater Valley worth staying in for so long.
The transition involves real adjustments — the community dynamics are different, the pace is slightly faster, and the social fabric takes longer to build in a city than in a town of 1,300 people. But the residents who’ve made this move consistently describe it as the right call for their stage of life, even as they hold genuine affection for Kamiah.
If you’re planning the move, prepare early, give the housing search realistic lead time, and don’t underestimate the value of a flexible storage solution during the transition. The logistics are manageable with the right planning — and Elk Country Storage Co. is here to help bridge the gap with month-to-month, no-deposit storage in Kamiah while you get settled in Lewiston.
Share this guide with anyone in the Clearwater Valley considering the same move — and drop a comment with any questions about what life in Lewiston is actually like after the boxes are unpacked.
Elk Country Storage Co.: (208) 630-3753 Reserve a unit: elkcountrystorageco.com/reserve
Related Resources from Elk Country Storage Co.:
- Short-Term Self Storage When Moving — Using storage to bridge the Kamiah-to-Lewiston transition gap
- Decluttering Before a Move: Room-by-Room Checklist — What to bring, store, and leave behind
- Kamiah Storage Units — Reserve a unit in Kamiah before you leave
- Kooskia Storage Units — Storage along the US-12 corridor
- Month-to-Month Storage — Flexible rental terms for unpredictable moving timelines
Idaho RV owners face a specific set of challenges when the travel season ends. Clearwater Valley winters bring sustained freezing temperatures, snow accumulation, freeze-thaw moisture cycling, and months of potential UV exposure — and an RV that isn’t properly prepared and stored before all of that arrives is an RV that often needs expensive repairs before it rolls again in spring.
Knowing how to store an RV long term in Idaho is not a single task — it’s a systematic process covering everything from water system draining to battery maintenance, tire protection, pest prevention, and choosing the right storage facility. Get it right, and your RV comes out of storage in spring exactly as it went in. Get it wrong, and you’re dealing with cracked pipes, a destroyed battery, mold in the living space, or worse.
This guide covers the entire long-term storage process from start to finish: what to do before the RV goes away, how to winterize it for Idaho conditions, how to maintain it during storage, what to look for in a storage facility, and a complete checklist you can follow before the doors close for the season.
How to Store an RV Long Term Safely and Effectively?
Long-term RV storage is effective when it combines complete pre-storage preparation, appropriate environmental protection, and periodic maintenance checks throughout the storage period.
The core principles are the same whether you’re storing for one winter or several seasons:
- Remove all threats from inside: water in the plumbing, food in the pantry, battery charge left unmanaged, and moisture trapped in the interior
- Protect from outside threats: weather, UV exposure, pests, and theft
- Choose the right storage environment: indoor, covered, or outdoor — each with specific tradeoffs
- Maintain the RV during storage: monthly checks, battery maintenance, tire pressure monitoring, and quick inspections that catch problems before they grow
The biggest long-term storage mistakes aren’t dramatic — they’re small oversights compounded by months of neglect. A slightly damp interior sealed for winter becomes a mold problem. A battery left in the cold without a maintainer needs replacement before spring. Water left in a single fitting cracks it at the first hard freeze. Systematic preparation prevents all of it.
Why Is Proper RV Storage Important in Idaho?
Idaho’s climate makes proper RV storage non-negotiable — sub-freezing temperatures, snow loads, moisture cycling, and UV exposure all cause measurable damage to RVs stored without adequate preparation.
What Does Idaho Winter Do to an Unprepared RV?
Freezing temperatures are the primary threat. The Clearwater Valley and most of central and northern Idaho regularly drops well below 0°F. Any water remaining in an RV’s freshwater system — tanks, lines, pump, water heater, toilet — freezes, expands, and cracks the containing component. A cracked water heater, burst freshwater line, or damaged pump is an avoidable repair that runs from hundreds to thousands of dollars.
Snow accumulation loads the roof, roof vents, slideout seals, and any unsealed horizontal surfaces with substantial weight. An inadequate cover or no cover at all allows snow to sit on EPDM roofing for months — compressing seals, stressing roof structures, and driving moisture into any seam with even minor existing wear.
Moisture and freeze-thaw cycling are the slow killers. Every time the temperature crosses the freeze threshold, water in tiny gaps expands and contracts — progressively working into seams, delaminating walls, softening floor decking, and feeding mold inside the living space if any interior moisture was left behind.
UV exposure during storage is underestimated. Even in winter, UV radiation degrades rubber seals, EPDM roofing, exterior graphics, and any uncovered plastic components. An RV stored outdoors for several seasons without UV protection ages measurably faster than one stored under cover or indoors.
What Should You Do Before Putting an RV Into Long-Term Storage?
Pre-storage preparation is the phase that determines everything about the condition your RV is in when you retrieve it. It should be completed before the first hard freeze — in Idaho’s Clearwater Valley, target mid-October at the latest.
How Should You Clean the RV?
Clean the entire RV — interior and exterior — before storage, not after.
Dirt, food residue, and organic material left on surfaces during months of storage create conditions for mold growth, attract pests, and cause staining that is significantly harder to remove after sitting. Cleaning before storage is always more effective and far less work than cleaning a mold-damaged, pest-visited RV in spring.
Exterior:
- Wash the RV with an appropriate RV-safe cleaner — not dish soap or household detergents, which degrade sealants
- Inspect the roof, seams, slideout seals, and window frames for cracks or gaps — address any sealant failures before storage
- Apply a UV-protective wax or RV protectant to fiberglass, painted surfaces, and any exposed plastic
- Clean and treat all rubber seals and weather stripping with a rubber conditioner
Interior:
- Remove all food, beverages, and anything that can attract pests
- Vacuum carpets and upholstery thoroughly; wipe all surfaces with a mildew-resistant cleaner
- Clean the refrigerator completely, defrost if applicable, and leave the door propped open during storage
- Empty and clean the toilet black tank completely
- Leave all interior cabinet and closet doors slightly open for airflow
How Do You Empty Water Systems?
Drain every water-containing system in the RV completely — freshwater tank, water heater, all supply lines, pump, gray tank, and black tank.
The procedure for a thorough freshwater system drain:
- Turn off the water heater and allow it to cool before draining
- Open all faucets — hot and cold — at every sink, shower, and external shower
- Open the low-point drain valves (typically located on the underside of the RV) to drain supply lines
- Drain the freshwater tank completely via its drain fitting
- Drain the water heater via the drain plug — with the pressure relief valve open to allow air in
- Use compressed air to blow out any remaining water in the lines
- Pour propylene glycol marine-grade RV antifreeze into the drain traps under each sink and into the toilet to protect the P-traps from freeze damage
- Drain the black and gray tanks completely at an appropriate dump station before storage
Why Is Winterization Necessary?
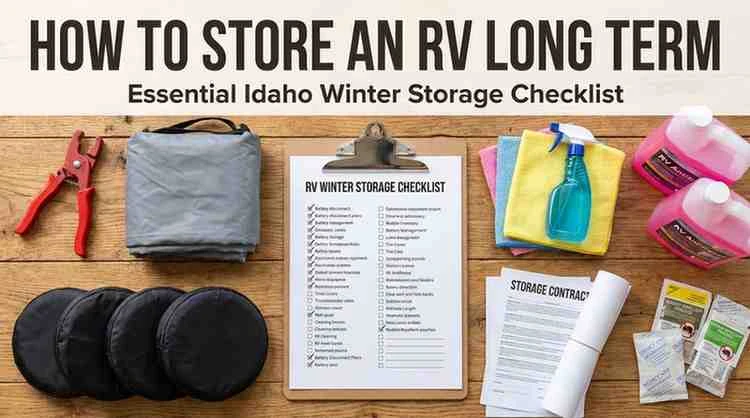
Winterization is necessary because even a small amount of water left in any part of the plumbing system will freeze in Idaho’s temperatures — and freezing water expands with enough force to crack pipes, fittings, tanks, and pump housings that cost significantly more to repair than the winterization procedure costs to complete.
Propylene glycol RV antifreeze (pink antifreeze, non-toxic) is used to fill the P-traps, toilet bowl, and any plumbing segments that can’t be fully drained by gravity. It is not the same as automotive antifreeze and is safe for use in water systems. Use only antifreeze specifically labeled for RV/marine potable water systems.
How Should You Protect the Interior?
Interior protection during long-term storage focuses on three things: preventing moisture accumulation, blocking pest entry, and preserving soft surfaces and materials.
- Place moisture absorbers (calcium chloride or desiccant products) in the bedroom, living area, bathroom, and any enclosed storage compartments
- Cover upholstered furniture and mattresses with breathable fabric covers — not plastic, which traps moisture
- Close all window blinds or curtains to reduce UV exposure on interior fabrics and surfaces
- Seal all exterior openings: cover the furnace exhaust vent, refrigerator vent, and any other exterior openings with mesh or purpose-made covers to prevent pest entry
- Leave interior doors and cabinet doors open to allow airflow
What Maintenance Tasks Should Be Completed First?
Before storage is the right time for maintenance that protects the RV during downtime:
- Roof inspection: Walk the roof and inspect every seam, vent base, and penetration for cracks in sealant — reseal any areas showing wear
- Slide-out seal treatment: Clean and treat all slide-out seals with a slide-out rubber conditioner
- Brake inspection: If the RV has been in regular use, check brake pads and drums before a season of storage when corrosion can develop
- Tire inspection: Check for sidewall cracking, tread wear, and proper inflation — address before storage
Should You Choose Indoor, Covered, or Outdoor RV Storage?
For Idaho’s climate, indoor or covered storage is the recommended choice for any RV owner who wants maximum long-term protection. The combination of snow loads, UV exposure, and freeze-thaw moisture cycling makes unprotected outdoor storage a measurably higher-risk option over multiple seasons.
| Storage Type | Advantages | Disadvantages |
|---|---|---|
| Indoor Storage | Maximum protection from weather, UV, pests, and theft; ideal for long-term preservation of high-value RVs | Highest cost; availability limited in smaller markets; size restrictions for very large rigs |
| Covered Storage | Roof protection from snow and direct rain; UV protection from above; good airflow; typically more affordable than fully enclosed | Open sides allow wind-driven moisture and some weather exposure; less security than fully enclosed |
| Outdoor Storage | Lowest cost; typically most widely available; few size restrictions | Maximum weather exposure; UV degradation; snow load risk; highest pest access risk; requires quality cover |
For most Idaho RV owners, covered storage with a quality RV cover is a practical and cost-effective solution that meaningfully reduces the risks of outdoor storage without the full cost of indoor. For higher-value motorhomes and fifth wheels, fully enclosed indoor storage is the better long-term investment.
Elk Country Storage Co. offers vehicle storage at both Kamiah and Kooskia locations, with unit bays up to 10×30 sized for most recreational vehicles and travel trailers. Rentals are available on a month-to-month basis with no deposit required — so you pay only for the months your RV is actually in storage.
How Can You Protect an RV From Idaho’s Winter Weather?
Protection from Idaho winter weather requires addressing five specific environmental threats: snow load, ice, moisture infiltration, UV radiation, and wind-driven debris.
Snow
A quality, purpose-built RV cover with a reinforced roof panel is the minimum. For outdoor storage specifically, a cover with heavy-duty denier rating and reinforced attachment points prevents sagging and collapse under snow accumulation. If the RV is stored in a covered facility, a lighter cover used primarily for dust and UV protection is sufficient.
Consider using telescoping roof support poles inside larger RVs to prevent roof flex under snow load if the RV is stored outdoors in a high-snowfall area.
Ice
Ice forms in any standing water and any gap where moisture can accumulate. The water system draining and antifreeze procedures above prevent freeze damage to plumbing. For the exterior, RV slide-out seals conditioned before storage are more resistant to ice bonding and tearing during cold snaps.
Moisture
Exterior sealant maintenance before storage prevents moisture from entering through seams. Interior moisture absorbers and ventilation prevent condensation from accumulating inside. A cover with ventilation — or a slightly open roof vent with a vent cover — allows moisture vapor to escape rather than condensing on interior surfaces.
UV Exposure
Even in winter, UV degrades uncovered exterior surfaces over months of storage. A quality UV-protective cover or enclosed storage eliminates this entirely. At minimum, apply an RV-appropriate UV protectant to fiberglass, rubber, and plastic surfaces before storage.
Wind
Wind-driven storage covers are an underappreciated problem — a shifting cover abrades the RV’s paint and graphics more than no cover at all. Use a cover with full attachment straps, belly bands, and tie-down loops, and check tension after the first major windstorm of the season.
How Do You Maintain an RV While It Is in Storage?
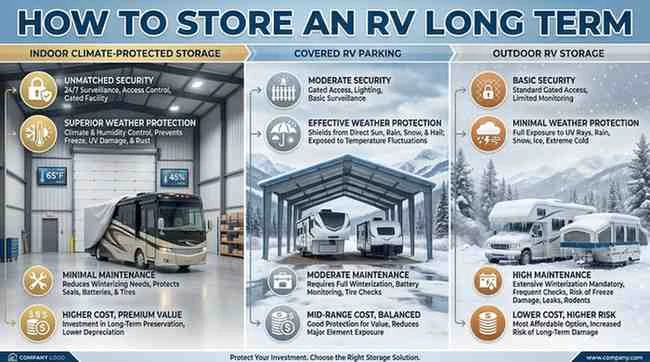
A stored RV is not a passive object — it needs periodic attention during storage to prevent small issues from compounding into significant problems over months.
Battery Care
Disconnect the house batteries from the RV’s 12V system to prevent parasitic drain from phantom loads — clocks, CO detectors, and other always-on systems will discharge batteries over weeks if not disconnected. Connect house batteries to a quality smart battery maintainer (not a simple trickle charger) that monitors charge level and maintains without overcharging.
For winterized RVs stored in locations where temperatures will drop below freezing, keep batteries in a location that stays above freezing — a conditioned indoor space is preferable to an unheated storage bay for battery health.
Tire Maintenance
Flat-spotting — a permanent deformation of tire sidewalls — occurs when an RV sits stationary on the same contact patch for months, especially in cold temperatures that harden the rubber. Prevention:
- Inflate tires to the maximum recommended cold pressure before storage
- Place tires on flat boards or purpose-made tire cradles to distribute the contact patch
- Apply a UV-protective tire dressing and cover tires with UV-blocking tire covers if stored outdoors
- Move the RV forward or backward by a few feet once a month if possible to rotate the contact patch
Pest Prevention
Rodents seek warm, enclosed spaces in fall — and an RV is an ideal habitat. Prevention is significantly easier than remediation:
- Place expanding foam or steel wool in any gap around plumbing penetrations, wire bundles, and other entry points
- Use purpose-made RV rodent repellent products (peppermint oil-based, ultrasonic devices, or bait stations placed outside the RV)
- Check entry points monthly during storage — new gaps can appear as the RV settles or seals age
Routine Inspections
At minimum, visit your stored RV once per month to:
- Check tire pressure and look for sidewall changes
- Inspect for signs of pest activity — droppings, nesting material, chewed items
- Look for any water stains indicating a new leak
- Check that moisture absorbers haven’t reached capacity
- Verify the battery maintainer is functioning
What Are the Most Common Long-Term RV Storage Mistakes?
| Mistake | Potential Consequence | Prevention |
|---|---|---|
| Skipping water system winterization | Cracked pipes, fittings, tanks, and pump; costly plumbing repairs | Drain all systems completely; flush with RV antifreeze |
| Leaving batteries installed without a maintainer | Dead or frozen battery; replacement required before spring | Disconnect or connect to a smart battery maintainer |
| Storing with moisture inside the living space | Mold, mildew, odor, upholstery damage | Clean thoroughly before storage; use moisture absorbers; ensure ventilation |
| Using the wrong cover or no cover | UV degradation, water infiltration, graphic damage, abrasion | Use a purpose-built, properly fitted RV cover with ventilation |
| Ignoring tire maintenance | Flat-spotting, sidewall cracking, tire failure at first spring drive | Inflate to max cold pressure; use tire cradles; add UV covers |
| Skipping the roof and sealant inspection | Water infiltration, delamination, interior water damage | Inspect and reseal all roof seams and penetrations before storage |
| Not addressing pest prevention | Rodent nesting, chewed wiring, insulation damage, health risks | Seal entry points, use repellents, check monthly |
| Choosing an unsecured storage location | Theft, vandalism, unauthorized access | Select a facility with gated, keypad-controlled access |
What Features Should You Look for in an RV Storage Facility?
The right RV storage facility combines physical security, appropriate shelter, accessible access policies, and unit sizes that actually fit your rig.
Security: Perimeter fencing with keypad-controlled gate access is the baseline. You want to know that only authorized renters can enter the facility. Lighting in drive aisles matters for early morning and evening access.
24/7 access: RV owners often need to retrieve gear, perform checks, or prepare for a trip on schedules that don’t conform to office hours. A facility with 24/7 gate access removes that constraint entirely.
Unit or bay sizing: Class A motorhomes, fifth wheels, and large travel trailers with slides extended can exceed 45 feet in total length. Confirm that the facility has bays long enough for your specific rig before reserving. At Elk Country Storage Co., bays up to 10×30 are available — appropriate for most standard recreational vehicles.
Storage type options: Having the choice between outdoor, covered, and enclosed indoor storage allows you to match the protection level to your rig’s value and your budget.
Rental flexibility: Long-term storage doesn’t always mean exactly the same number of months every year. A month-to-month storage arrangement with no minimum commitment means you pay for the actual months of storage, not a fixed annual lease.
No deposit: Getting a storage rental started at the end of the travel season — when you may also be managing other maintenance and preparation costs — is easier without a large deposit. Elk Country Storage Co. requires no deposit to begin a rental.
What Is the Ultimate Long-Term RV Storage Checklist?
Work through this checklist before your RV goes into long-term storage in Idaho:
Cleaning
- Wash exterior with RV-safe cleaner; apply UV-protective wax or protectant
- Inspect and reseal roof seams, window frames, and all penetrations
- Treat all rubber seals and weather stripping with conditioner
- Clean interior thoroughly — vacuum upholstery, wipe all surfaces, remove all food
- Clean and defrost refrigerator; prop door open for storage
- Drain and clean black tank completely
Water System Winterization 7. Turn off and cool water heater; drain via drain plug 8. Open all faucets; open low-point drain valves 9. Drain freshwater tank 10. Blow out lines with compressed air 11. Pour RV antifreeze (propylene glycol) into all P-traps and toilet bowl 12. Remove and drain water filter cartridges
Maintenance Before Storage 13. Change engine oil and filter (motorhomes) 14. Check brake condition; note any items for spring service 15. Inspect slide-out seals; treat with conditioner 16. Inspect and clean awning; retract and secure for storage
Battery and Electrical 17. Disconnect house batteries from the 12V system 18. Fully charge house batteries 19. Connect to a smart battery maintainer rated for the battery bank size 20. Remove or cover the chassis battery maintainer if the motorhome will be in a location with power access
Tires 21. Inflate to maximum recommended cold pressure 22. Place on tire cradles or boards 23. Apply UV-protective tire dressing 24. Cover with UV tire covers if stored outdoors
Pest and Moisture Prevention 25. Seal all exterior penetrations and gaps with steel wool or expanding foam 26. Place RV rodent repellent products around the exterior perimeter 27. Place moisture absorbers in bedroom, living area, bathroom, and all enclosed compartments 28. Leave all interior cabinet and closet doors open for airflow
Cover and Security 29. Apply fitted RV cover with proper attachment and ventilation, or arrange covered/indoor storage 30. Confirm gate access code for the storage facility 31. Photograph the RV interior and exterior for insurance documentation 32. Note the storage address, unit number, and contact for the facility
What Does Long-Term RV Storage Look Like for a Clearwater Valley Owner?
Consider a realistic scenario: a Kamiah-area couple owns a 32-foot fifth wheel they use from April through October — camping in the Clearwater Valley drainages, exploring central Idaho, and making an annual trip to the coast. When October ends, the rig needs somewhere to go for five to six months.
The challenge: Their property has limited flat space, and leaving the fifth wheel on the gravel driveway means snow accumulation on the roof, limited security, and no environmental protection through an Idaho winter.
Preparation: In early October, they work through the complete checklist. The water heater is drained, all lines blown out with a compressor, and RV antifreeze flushed through the system. The refrigerator is cleaned and left open. All food and loose gear is removed. House batteries are disconnected and put on a smart maintainer in the garage. Roof seams are inspected — one area near the front AC unit shows cracking sealant, which is addressed before storage.
Storage selection: They reserve a covered bay at a Clearwater Valley storage facility — large enough for the fifth wheel with the hitch, with 24/7 keypad access and month-to-month rental terms. No deposit was required, making the reservation easy to place in the same week they finished winterization.
During storage: One visit per month to check tire pressure, look for pest signs, and confirm the moisture absorbers haven’t reached capacity. A brief visual check of the exterior during each visit.
Spring outcome: In early April, the fifth wheel is retrieved in the same condition it was stored. The battery maintainer has kept the house batteries at full capacity. The one repaired roof seam shows no water intrusion. The rig is road-ready within an afternoon of de-winterizing.
The key lesson: preparation done in October takes three to four hours and prevents multiple potential spring repairs. The storage facility provides the protection the driveway couldn’t.
For RV owners across the Clearwater Valley, Elk Country Storage Co.’s vehicle storage options in Kamiah and Kooskia — with bays up to 10×30, 24/7 gate access, and no deposit required — provide exactly this kind of practical long-term storage solution. The storage unit size guide can help confirm what bay size fits your specific rig before you reserve.
Frequently Asked Questions About Long-Term RV Storage
How long can an RV remain in storage? A properly winterized and prepared RV can remain in long-term storage indefinitely. Most Idaho owners store for five to seven months between October and April. Monthly maintenance checks and annual inspections before returning to service keep long-term storage from causing preventable problems.
How often should I check on my stored RV? At minimum, once per month. Monthly checks should cover tire pressure, pest activity, moisture absorber saturation, battery maintainer function, and a quick exterior look for any new damage or cover shifting.
Is indoor RV storage worth the cost? For high-value motorhomes and fifth wheels, yes. The protection against snow load damage, UV degradation, moisture cycling, and theft that indoor storage provides typically costs less over a multi-year period than the repairs those threats cause in outdoor storage. For lower-value or older units, covered storage is a cost-effective middle ground.
Should I disconnect my RV battery? Disconnect the house batteries from the RV’s 12V system to prevent parasitic drain, but connect them to a smart battery maintainer. Batteries left fully discharged in freezing temperatures can freeze and are permanently damaged. Disconnect from the RV — not from the maintainer.
How do I prevent rodents from entering my RV? Seal all exterior penetrations and gaps with steel wool, expanding foam, or mesh. Use rodent repellent products around the perimeter. Remove all food from the interior. Check monthly for signs of entry. Outdoor-stored RVs are at higher risk than those in enclosed or well-maintained indoor facilities.
Can snow damage an RV? Yes. Snow accumulation on RV roofs adds substantial weight that stresses roof structures, compresses seals, and can cause damage at attachment points for roof-mounted equipment. An appropriate cover, covered storage, or indoor storage prevents direct snow accumulation.
What is the best RV cover for winter storage? A purpose-built, model-specific or size-appropriate polypropylene cover with a reinforced roof panel, full belly straps, UV resistance, and integrated ventilation panels. Generic tarps are not appropriate — they trap moisture, abrade surfaces, and fail to shed snow properly.
Should I store my RV with a full fuel tank? For motorhomes: fill the tank and add fuel stabilizer, then run the engine briefly to circulate the treated fuel. A full tank minimizes the air space in which condensation can form and introduce water into the fuel. For tow vehicles used to haul fifth wheels or trailers, the same applies.
How do I prepare my plumbing system for winter? Drain all tanks and lines completely, blow out lines with compressed air, and then flush P-traps and the toilet with propylene glycol RV antifreeze. Do not use automotive antifreeze — it is toxic and inappropriate for potable water systems.
What is the safest way to store an RV long term? Complete the full pre-storage preparation checklist, store in an indoor or covered facility with gated, 24/7 access, use a quality RV cover even indoors for dust and pest protection, maintain the battery with a smart maintainer, and perform monthly checks during the storage period. The combination of thorough preparation and appropriate storage conditions produces consistently good long-term outcomes.
Final Thoughts on How to Store an RV Long Term
Knowing how to store an RV long term in Idaho is one of the most practical skills an RV owner in this state can develop — and the return on investment is direct and measurable. A few hours of preparation in October prevents multiple potential spring repairs, protects a significant financial investment, and ensures that the first day of the new travel season is a launch, not a troubleshooting session.
The process isn’t complicated, but it requires completeness. Partial winterization is nearly as risky as none at all. A single missed water line, an uncharged battery, an uninspected roof seam — any of these can become an expensive problem over five months of Idaho winter. The checklist above addresses all of it.
For Clearwater Valley RV owners who want secure, accessible, flexible off-season storage, Elk Country Storage Co. offers vehicle storage at Kamiah and Kooskia with the rental terms that make long-term storage practical: month-to-month, no deposit, and 24/7 access when you need it.
If this guide helped you plan your RV’s winter storage, share it with a fellow owner heading into their first Idaho winter — and reach out with any questions about storage options in the Clearwater Valley.
Call or text: (208) 630-3753  Email: [email protected] Reserve storage: elkcountrystorageco.com/reserve
Kamiah: 303 Locust Rd, Kamiah, ID 83536 Kooskia: 4689 Hwy 13 South, Kooskia, ID 83539
Related Resources from Elk Country Storage Co.:
- Vehicle Storage — Secure bays for RVs, motorhomes, fifth wheels, and trailers
- Month-to-Month Storage — Flexible seasonal rental terms with no long-term contract
- No-Deposit Storage — Start your RV storage rental without upfront costs
- Storage Unit Size Guide — Confirm the right bay size for your specific rig
- How to Store a Boat for Winter in Idaho — Companion guide for watercraft owners
How to store a boat for winter in Idaho involves more than finding a place to park it. It means systematically protecting the engine, fuel system, freshwater plumbing, electrical components, hull, and interior from the specific damage that Idaho winters cause — and doing it in the right sequence before the first hard freeze arrives.
This guide covers every step: cleaning and inspection, engine winterization for both outboard and inboard motors, fuel stabilization, battery care, cover selection, storage type comparison, and a complete checklist you can follow before your boat goes away for the season. Whether you’re a first-time boat owner or a veteran seasonal boater, the steps below will protect your investment and have you ready to launch the moment the water opens in spring.
How to Store a Boat for Winter in Idaho: The Complete Overview
Storing a boat for winter in Idaho requires completing winterization before temperatures drop below freezing — typically by mid-to-late October in most of the state.
The core process has five phases:
- Clean the boat — interior and exterior — to prevent mold, odor, and corrosion during storage
- Stabilize the fuel system and drain or treat freshwater systems to prevent freeze damage
- Winterize the engine — outboard or inboard — using fogging oil, gear lube changes, and marine antifreeze where applicable
- Prepare and store the battery to prevent freeze damage and capacity loss
- Select the right storage — indoor, covered, or outdoor — and protect with an appropriate boat cover or shrink wrap
Skip any of these steps and you’re gambling against Idaho’s weather. Skip the engine winterization and risk cracked blocks, corroded cylinders, and seized components. Skip the fuel stabilization and face gummed injectors and carburetor damage in the spring. Skip the freshwater system draining and get cracked hoses, fittings, and pump housings when the temperature drops below 32°F.
Common mistakes to avoid:
- Waiting until after the first freeze to start winterization
- Leaving standing water anywhere in the plumbing system
- Using a tarp instead of a purpose-built boat cover
- Storing a boat with a partially charged battery
- Neglecting the bilge, livewell, and baitwell draining
Why Is Winter Boat Storage Important in Idaho?
Idaho winters create specific conditions that cause measurable, expensive damage to boats that aren’t properly prepared and stored.
Freezing Temperatures
In most of Idaho — including the Clearwater Valley, the Snake River Plain, and the northern lake regions — winter temperatures regularly drop well below 0°F. Any water left in a boat’s plumbing, engine cooling system, or live well will freeze, expand, and crack the component containing it. Marine antifreeze and thorough system draining prevent this. Neglect cannot be undone cheaply.
Snow Accumulation
Idaho winters bring significant snow loads, particularly in northern and central Idaho. An uncovered or improperly covered boat left outdoors can accumulate hundreds of pounds of snow on the deck, canvas, and hull. That weight stresses structural components, deforms canvas covers, collapses bimini tops, and can damage the hull at stress points. Proper cover selection — and ideally indoor or covered storage — eliminates this risk.
Moisture Damage and Corrosion
Freeze-thaw cycles drive moisture into every gap, seam, and crevice. Moisture combined with months of storage creates ideal conditions for mold, mildew, upholstery rot, wood delamination in older hulls, and metal corrosion throughout the electrical and mechanical systems. Proper cleaning, ventilation, and moisture absorbers inside the cabin significantly reduce this damage.
Engine Damage
Water in engine cooling passages freezes and expands with enough force to crack engine blocks, cylinder heads, and manifolds. This is among the most expensive winterization failures a boat owner can experience — repairs routinely run into thousands of dollars. A $15 can of marine antifreeze and a proper flush procedure prevents it entirely.
What Should You Do Before Putting a Boat Into Winter Storage?
Before any engine work or cover goes on, a thorough cleaning and systems inspection is the foundation of effective winter storage preparation.
How Should You Clean the Boat Interior and Exterior?
Clean the boat completely before storage — not after. Dirt, algae, fish residue, food, and water stains left on surfaces for months become significantly harder to remove in spring and create conditions for mold and corrosion to develop during storage.
Exterior cleaning:
- Wash the hull with a marine soap, paying attention to the waterline where algae and mineral deposits accumulate
- Wax or apply a hull protectant after washing to create a barrier against UV exposure and moisture
- Clean and inspect all running lights, cleats, and hardware — treat metal components with a corrosion inhibitor
- Inspect the hull for cracks, blisters, or stress damage that should be addressed before storage
Interior cleaning:
- Remove all food, coolers, cushions, life jackets, and loose gear from the cabin and storage compartments
- Vacuum carpet and upholstery thoroughly — food debris and organic material attract mold and pests
- Wipe all surfaces with a mildew-resistant cleaner
- Leave locker doors and cabinet doors slightly open to allow airflow during storage
- Remove electronics, fish finders, and any removable gear to store separately indoors
Why Is Fuel Stabilization Important?
Fuel left untreated in a boat’s tank over winter breaks down chemically, forming varnish and gum deposits that clog fuel injectors, carburetors, and fuel lines — often requiring professional cleaning or component replacement.
Add a marine-grade fuel stabilizer to the tank before your last use of the season, then run the engine for at least 10 minutes to circulate the treated fuel throughout the entire fuel system — including the carburetor or injectors. A stabilizer-only treatment in the tank without running it through the system offers incomplete protection.
Top off the tank after adding stabilizer to minimize the air space in which condensation can form and introduce water into the fuel.
Should You Change the Engine Oil Before Storage?
Yes — always change the engine oil before winter storage, not in the spring. Used engine oil contains combustion byproducts, acids, and moisture that cause internal corrosion if left sitting in the engine for months. Fresh oil going into storage protects internal components throughout the off-season.
Change the oil filter at the same time, and check and replace the gear lube in the lower unit of outboard motors and sterndrives. Used gear lube often contains water intrusion from worn seals — leaving it over winter accelerates bearing and gear corrosion.
How Do You Protect Freshwater Systems?
Every freshwater system on the boat — freshwater tanks, water pumps, plumbing lines, livewells, baitwells, raw water cooling systems, and bilge areas — must be drained completely or treated with marine antifreeze before storage.
The procedure varies by system type:
- Freshwater tanks and plumbing: Drain completely, then flush with a mix of water and propylene glycol marine antifreeze (not automotive antifreeze — it’s toxic to aquatic systems)
- Raw water cooling systems on inboard engines: Flush with fresh water, then circulate marine antifreeze through the system
- Livewells and baitwells: Drain completely and leave the drain plug out during storage
- Bilge: Pump the bilge dry, then absorb any residual moisture with bilge absorbent pads
How Do You Winterize a Boat Engine?
Engine winterization is the most technically critical part of winter boat storage preparation — it protects the components most vulnerable to freeze damage and corrosion.
How to Winterize an Outboard Motor
- Flush the cooling system with fresh water using the flush port or garden hose ear muffs — run for 5–10 minutes until water runs clear and warm
- While the engine is running on the flush, add fogging oil to the carburetor or air intake per manufacturer instructions — this coats cylinder walls and internal metal surfaces with a protective oil film
- Let the engine run until it stalls from the fogging oil treatment, then turn off
- Drain all water from the motor by tilting it fully down, then tilting it to the up position to allow drainage
- Change the lower unit gear lube — drain the old lube by removing both the top and bottom plugs, inspect for milky coloration (water intrusion), and refill with fresh gear lube
- Remove the propeller, inspect for dings and fishing line wrapped around the shaft, grease the prop shaft, and reinstall or store the prop separately
- Disconnect and remove the battery
How to Winterize an Inboard Engine
Inboard engines require more careful attention to the raw water cooling circuit, which cannot drain by gravity the way an outboard can.
- Change the engine oil and filter
- Flush the raw water cooling system with fresh water
- Circulate marine antifreeze through the raw water cooling system — the procedure varies by engine, so consult your engine manual for the specific flush point
- Fog the engine cylinders through the spark plug holes or intake with fogging oil
- Change the gear lube in the transmission
- Inspect and service all hoses and clamps in the cooling and fuel systems
- Drain and treat the freshwater cooling loop (if closed-loop cooled) per manufacturer guidance
How Do You Protect the Sterndrive?
Sterndrives (MerCruiser, Volvo Penta, and similar configurations) combine elements of inboard and outboard systems and require specific attention:
- Flush and treat the raw water cooling circuit
- Change the sterndrive gear lube in both the upper and lower housings
- Inspect the bellows (exhaust, shift, and U-joint bellows) for cracks — failed bellows are a leading cause of water intrusion and sinking at the dock
- Grease all sterndrive pivot points and trim cylinder fittings
- Tilt the sterndrive to the full down position for winter storage to drain the trim cylinders
What Is Marine Antifreeze Used For?
Marine antifreeze — propylene glycol formulas specifically labeled for marine use — is used to protect freshwater plumbing systems, livewells, and raw water cooling circuits from freeze damage without introducing toxins into the water system.
It is not the same as automotive antifreeze (ethylene glycol), which is toxic and inappropriate for use in any water system that will contact aquatic environments. Marine antifreeze is also used to protect the water heater, shower sump, and any other plumbing aboard cabin boats.
Should You Choose Indoor or Outdoor Boat Storage in Idaho?
For Idaho winters specifically, indoor or covered storage is the recommended choice for any boat owner who wants maximum protection — the combination of snow loads, freeze-thaw cycles, and UV exposure during storage makes outdoor-only storage a higher-risk option.
| Feature | Indoor Storage | Covered Storage | Outdoor Storage |
|---|---|---|---|
| Weather protection | Maximum — fully enclosed | Strong — roof, open sides | Minimal — boat cover only |
| Snow load protection | Complete | Complete | Depends on cover |
| UV protection | Complete | Partial | Depends on cover |
| Rodent and pest risk | Low | Low-medium | Higher |
| Security | Highest | Good | Variable |
| Cost | Highest | Moderate | Lowest |
| Accessibility | By facility hours or 24/7 | Often 24/7 | Typically 24/7 |
| Best for | High-value boats, long storage | Most Idaho boat owners | Budget storage, mild winters |
For Clearwater Valley boat owners, Elk Country Storage Co. offers vehicle storage options including large unit bays at the Kamiah and Kooskia locations — sized for boats, trailers, and watercraft that need secure off-season storage in a maintained facility. Units up to 10×30 accommodate most recreational watercraft. All rentals are month-to-month with no deposit required, so you pay only for the months your boat is in storage.
What Type of Boat Cover Is Best for Idaho Winters?
For outdoor or covered storage in Idaho, a fitted, marine-grade canvas or polyester boat cover specifically designed for your boat model is the minimum acceptable protection. Shrink wrap is the superior option for maximum weather sealing.
Fitted Canvas or Polyester Covers
Purpose-built boat covers are manufactured to fit specific boat models and create a sealed envelope over the hull and deck. Key features for Idaho winter use:
- Waterproof rating: Look for covers rated at 600 denier or higher for heavy-duty protection
- UV resistance: Prolonged winter sun exposure degrades cheaper cover materials
- Venting: Essential — covers without ventilation trap moisture inside, creating worse mold conditions than no cover at all
- Tie-down straps and buckles: Proper fastening prevents wind from lifting or shifting the cover
Shrink Wrap
Shrink wrap — professionally applied marine shrink wrap — creates a fully sealed, tight-fitting enclosure around the boat. It’s the most weather-resistant option short of indoor storage, and it eliminates the flapping, shifting, and water pooling that even good canvas covers can experience in heavy snow.
Shrink wrap must be applied professionally to include interior ventilation. A shrink-wrapped boat without ventilation will develop severe mold from trapped interior moisture.
What to Avoid
- Standard canvas tarps — they pool water, trap moisture, shift in wind, and provide inadequate UV protection
- Generic “universal fit” covers — they don’t seal properly and allow water and snow infiltration
- Any cover without ventilation — moisture accumulation inside an unsealed cover causes more damage than no cover in some cases
How Should You Store and Maintain a Boat Battery During Winter?
Remove the boat battery before winter storage — leaving it installed in a cold, unattended boat is one of the most reliable ways to destroy it before spring.
Why Battery Removal Matters
Marine batteries self-discharge at approximately 1% per day at room temperature, and faster in cold conditions. A fully charged battery stored in freezing temperatures can survive the winter intact. A discharged battery in freezing temperatures will freeze solid — physically expanding and cracking the battery case, destroying the cells permanently.
Proper Battery Storage Steps
- Remove the battery from the boat before the first hard freeze
- Clean the terminals with a baking soda and water solution to remove corrosion
- Fully charge the battery before storage
- Store in a cool (not freezing) dry location — a garage shelf or indoor storage space is ideal
- Connect to a quality trickle charger or battery maintainer (smart charger) that will maintain charge without overcharging throughout the winter months
- Check the charge level monthly if not on a maintainer
A properly maintained marine battery stored this way will begin spring with full capacity. A battery left in a frozen boat will often need immediate replacement before the first spring launch.
How Can You Prevent Mold, Mildew, and Moisture Damage?
Mold and mildew in a stored boat are caused by trapped moisture combined with organic material — food residue, upholstery off-gassing, and humid air sealed inside an enclosed space. Prevention requires both thorough cleaning and active ventilation.
Ventilation Strategies
- Leave all interior locker doors, cabinet doors, and compartment hatches slightly open during storage to allow air circulation
- Use a boat cover or shrink wrap with proper ventilation ports — never seal a boat completely airtight
- For enclosed cabins, small electric dehumidifiers (if power is available at the storage location) dramatically reduce interior moisture levels
- Vent ports in shrink wrap should be installed by the professional applying the wrap
Moisture Absorbers
- Place moisture-absorbing products (calcium chloride-based products or desiccant bags designed for marine use) in the cabin, storage compartments, and any enclosed spaces
- Replace them partway through a long storage season — they become saturated and ineffective once full
Interior Cleaning
Mold cannot grow on a surface that provides no organic material. Thorough cleaning — vacuuming upholstery, wiping all surfaces with a marine mildew-resistant cleaner, and removing all organic materials (food, bait, fishing rags) — eliminates the substrate mold needs to take hold.
What Are the Most Common Boat Storage Mistakes?
| Mistake | Potential Damage | Prevention |
|---|---|---|
| Skipping engine winterization | Cracked block, seized cylinders, corroded internals — thousands in repairs | Complete full engine winterization before first freeze |
| Leaving water in systems | Cracked hoses, pump housings, fittings, and plumbing components | Drain all systems completely; use marine antifreeze |
| Ignoring battery maintenance | Dead or frozen battery, requiring replacement before spring launch | Remove battery, store indoors, connect to a maintainer |
| Poor boat cover selection | Water infiltration, mold, snow load damage, UV degradation | Use fitted marine cover or shrink wrap with proper ventilation |
| Improper storage location | Weather damage, theft, vandalism, rodent infestation | Choose indoor, covered, or secured facility storage |
| Leaving fuel untreated | Varnished injectors, clogged carburetors, gummed fuel lines | Add marine fuel stabilizer, run through entire system |
| Skipping oil change | Internal corrosion from acidic used oil sitting in engine for months | Change oil and filter before storage, not in spring |
What Is the Ultimate Winter Boat Storage Checklist?
Work through this checklist before your boat goes into storage for the Idaho winter:
Cleaning and Inspection
- Wash hull exterior with marine soap; apply wax or protectant
- Clean and inspect all hardware — apply corrosion inhibitor to metal components
- Inspect hull for cracks, blisters, or damage
- Clean interior thoroughly — vacuum upholstery, wipe all surfaces with mildew-resistant cleaner
- Remove all food, beverages, fishing gear, cushions, and loose equipment
- Leave locker and cabinet doors slightly open for ventilation
Fuel System 7. Add marine-grade fuel stabilizer to tank 8. Run engine 10+ minutes to circulate stabilizer through entire fuel system 9. Top off the fuel tank to minimize condensation space
Engine Winterization 10. Change engine oil and oil filter 11. Change lower unit or sterndrive gear lube — inspect for water contamination 12. Flush cooling system with fresh water 13. Treat raw water cooling system with marine antifreeze 14. Fog engine cylinders with fogging oil 15. For outboards: drain motor completely, tilt to drain, then store tilted up
Freshwater and Plumbing Systems 16. Drain freshwater tanks, water heater, and all plumbing lines 17. Flush system with propylene glycol marine antifreeze 18. Drain livewells, baitwells, and bilge — leave drain plugs out during storage 19. Remove the bilge drain plug and store it inside the boat (not in the boat — next to the ignition or in a visible location as a reminder to reinstall before launch)
Electrical and Battery 20. Remove and fully charge the battery 21. Clean terminals; connect to trickle charger or maintainer for storage 22. Remove or cover all electronics — fish finders, GPS, stereo — and store indoors
Cover and Storage 23. Apply fitted marine cover or arrange shrink wrap with proper ventilation 24. Place moisture absorbers in cabin and enclosed compartments 25. Select storage location — indoor, covered, or secured outdoor facility
How Might an Idaho Boat Owner Prepare a Fishing Boat for Winter?
Consider a typical scenario: a Clearwater Valley angler who runs a 20-foot aluminum fishing boat on the Clearwater and Snake Rivers through the steelhead season, wrapping up in late November as water temperatures drop and winter sets in.
Initial inspection: After the last fishing trip of the season, the owner runs the boat out of the water, inspects the hull for any dings or damage from rocky river bars, and notes a small crack in the transom drain plug housing that needs repair over winter.
Cleaning: The boat is washed completely — hull, deck, storage compartments, and the livewell — with marine soap. Upholstery is vacuumed and wiped down. All fishing gear, tackle boxes, and loose equipment are removed and stored in the garage.
Winterization: Fuel stabilizer is added to the tank and the outboard is run on the flush port for 15 minutes to circulate it. The lower unit gear lube is drained — the owner notes a slight milky color indicating minor water intrusion and makes a note to have the seals inspected before spring. Fogging oil is applied per the outboard manual. The cooling system is flushed and the motor is tilted to drain completely.
Battery: The marine battery is pulled, charged to full, and connected to a Battery Tender in the garage.
Storage: The boat is stored in a 10×30 unit at a local storage facility, out of the snow and weather entirely. A fitted cover is placed over it inside the unit for additional dust protection. Moisture absorbers are placed in the bow and stern compartments.
Spring readiness: In March, before the spring steelhead season, the owner reinstalls the battery, adds fresh fuel, has the lower unit seals inspected and replaced, repairs the transom drain housing, and launches two weeks into the season with a boat in the same condition it was stored in — not worse.
For Clearwater Valley boat owners looking for the same kind of secure, accessible off-season storage, the vehicle storage options at Elk Country Storage Co. — with units up to 10×30, 24/7 gate access, and month-to-month rentals with no deposit — offer exactly this kind of practical solution. Our storage unit size guide can help you determine what size bay fits your specific boat and trailer configuration.
Frequently Asked Questions: How to Store a Boat for Winter in Idaho
How do you store a boat for winter in Idaho? Store a boat for winter in Idaho by completing full engine winterization before the first freeze, stabilizing the fuel system, draining all freshwater plumbing, removing and maintaining the battery, applying a quality marine cover or shrink wrap, and placing the boat in secure indoor, covered, or outdoor storage. The full process should be completed by mid-October in most of central and northern Idaho.
Do boats need to be winterized in Idaho? Yes. Idaho winters regularly produce temperatures well below freezing, and any water left in an engine’s cooling system, freshwater plumbing, or bilge will freeze and expand with enough force to crack components. Winterization is not optional in Idaho — it’s the difference between a working boat in spring and a significant repair bill.
Is indoor boat storage worth the cost in Idaho? For most Idaho boat owners, yes. Indoor storage eliminates snow load damage, UV degradation, freeze-thaw moisture cycling, and security risks. The cost difference between indoor and outdoor storage is typically recouped in one avoided repair — particularly for higher-value watercraft stored over multiple seasons.
Can I store my boat outside during an Idaho winter? You can, but it requires a quality fitted marine cover or professional shrink wrap with proper ventilation, a fully completed winterization procedure, and a secure, maintained storage location. The risks of moisture intrusion, snow load damage, and UV degradation are meaningfully higher than indoor or covered storage.
What happens if I don’t winterize my boat in Idaho? Skipping winterization in Idaho typically results in freeze damage to the engine cooling system, cracked freshwater plumbing, a destroyed battery, and varnished fuel system components. Repair costs for freeze-damaged engine blocks and manifolds routinely exceed $2,000–$5,000. Full winterization costs a fraction of that in time and materials.
Should I remove the boat battery for winter storage? Always. Marine batteries discharged in freezing temperatures freeze solid and are destroyed. Remove the battery, store it indoors, charge it fully, and connect it to a quality battery maintainer throughout the winter. A properly maintained battery begins spring at full capacity.
What type of boat cover works best in Idaho winters? A purpose-built, fitted marine canvas or polyester cover rated at 600 denier or higher, with built-in ventilation. Professional shrink wrap is the superior option for outdoor storage — it creates a fully sealed, snow-shedding enclosure while allowing interior ventilation. Generic tarps are inadequate for Idaho winter conditions.
How long can a boat remain in storage? A properly winterized and stored boat can remain in storage indefinitely without degradation. Annual checks — inspecting for moisture intrusion, pest activity, cover condition, and battery charge — are good practice for any boat stored longer than six months.
What maintenance should be done before spring launch? Before spring launch: reinstall and test the battery, add fresh fuel, change the engine oil if not done before storage, inspect all belts and hoses, test the bilge pump, reinstall the drain plug, check fire extinguisher and safety equipment dates, and test the engine on the hose before launching.
How do I prevent mold in a stored boat? Clean the interior completely before storage — vacuum upholstery, wipe all surfaces, remove all organic material. Leave interior compartment doors slightly open for airflow. Use a boat cover or shrink wrap with proper ventilation (never seal airtight). Place moisture-absorbing products in the cabin and enclosed spaces.
Final Thoughts on How to Store a Boat for Winter in Idaho
Proper winter storage is one of the highest-return habits a boat owner can build — the difference between arriving at the spring launch ramp with a boat in excellent condition and arriving with one that needs a week of repairs before it’s on the water.
The steps aren’t complex, but they need to be completed in the right sequence and before Idaho’s temperatures drop below freezing. Engine winterization protects the components most vulnerable to catastrophic freeze damage. Fuel stabilization protects the injection and carburetion systems from a full off-season of degradation. Battery removal and maintenance protects the electrical system. And the right storage — indoor or covered whenever possible — protects everything else.
For Clearwater Valley boat owners who want a secure, accessible, and practical off-season storage solution, Elk Country Storage Co. is here with large-bay vehicle storage at both Kamiah and Kooskia, month-to-month terms, no deposit required, and 24/7 gate access so you can check on your boat whenever you need to.
If you found this guide useful, share it with a fellow boater who’s heading into their first Idaho winter — and feel free to reach out if you have questions about storage options in the Clearwater Valley.
Call or text: (208) 630-3753 Reserve storage: elkcountrystorageco.com/reserve
Related Resources from Elk Country Storage Co.:
- Vehicle Storage — Secure off-season storage for boats, RVs, trailers, and more
- Storage Unit Size Guide — Find the right bay for your boat and trailer
- No-Deposit Storage — Start your seasonal storage rental without upfront costs
- How to Store Fishing Gear in Winter — Off-season care for rods, reels, waders, and tackle
- Month-to-Month Storage — Flexible seasonal rental terms with no long-term contract
Introduction
Here’s the thing about moving clutter: it doesn’t disappear. Everything you skip over, shove in a box, and tape shut gets loaded onto the truck, driven to your new home, unloaded into a new garage or spare room, and unpacked — sometimes months later — into a space you were hoping to start fresh in. You pay to move it, you pay to store it, and then you deal with it anyway on the other end.
The decluttering before moving checklist most people follow is essentially: start too late, sort nothing, pack everything, regret it immediately upon arrival. This guide offers a better approach — one that breaks the job down room by room, gives you a clear four-category sorting framework, and builds in the specific decision points that make decluttering actually manageable rather than overwhelming.
For families and individuals across the Clearwater Valley — Kamiah, Kooskia, Orofino, and the surrounding communities — this is also a guide to using the moving process as an opportunity to right-size what you own before you bring it somewhere new. Whether your new home is bigger, smaller, or simply different in character from your current one, arriving with only what you actually want is one of the best gifts you can give yourself at move-in.
Why Decluttering Before You Pack Saves Time, Money, and Sanity
The case for decluttering first — before a single box gets taped — is straightforward and practical.
Every item you don’t move saves you money. Professional movers charge by weight and volume on most long-distance moves. Even on local moves, fewer boxes means fewer trips, a smaller truck, and less labor. The savings on moving a decluttered home versus a fully packed one can be meaningful.
Unpacking a decluttered home is exponentially faster. Every box that goes into your new home has to be opened, assessed, and put somewhere. Boxes full of items that don’t belong or that you don’t use create decision paralysis in an already-stressful moment. Arriving with only intentional belongings means unpacking is a process of placing, not sorting.
Decluttering reveals what you need to store versus move. Not everything you own needs to travel directly to your new home. Some items — seasonal gear, furniture that doesn’t fit the new space, belongings you’re not ready to part with but won’t need immediately — are natural candidates for a short-term storage unit rather than a moving box. Decluttering first clarifies that line.
Starting fresh matters more than most people admit. There’s a genuine psychological benefit to arriving somewhere new without the accumulation of every previous version of your household. Moving is one of the few natural break points where right-sizing your possessions is both practical and emotionally appropriate.
The Four-Category Sorting Framework
Before you open a single drawer or closet, set up four sorting categories that you’ll apply in every room. Having clear bins, bags, or labeled areas for each category prevents the “I’ll deal with this pile later” problem that derails most decluttering attempts.
Keep — Moving With You
This is everything that’s going to your new home. Be intentional about what earns this category. The test is simple: does this item have a specific place and purpose in your new home, or are you keeping it out of inertia?
Store — Not Moving Now, Not Letting Go
Some belongings aren’t coming to the new home immediately but aren’t ready to be donated, sold, or discarded either. Seasonal gear, furniture that doesn’t fit the new layout, sentimental items that need more time, or belongings in a holding pattern while you make a decision — these go into storage. Month-to-month storage with no long-term commitment is built exactly for this: a temporary home for the things that aren’t quite ready to move with you or leave your life.
Donate, Sell, or Give Away
Functional items with usable life left that simply don’t belong in your next chapter. Local donation centers, online marketplace listings, neighborhood buy-nothing groups, and family and friends are all viable channels. The important rule: set a deadline. Items designated for donation that sit in bags by the front door for three weeks have a way of migrating back into boxes.
Recycle or Discard
Broken items, worn-out clothing, expired products, outdated documents that don’t need retention, and anything that has no useful life left. This category expands significantly in rooms that tend to accumulate paperwork and miscellany — home offices, junk drawers, and garages.
Room-by-Room Decluttering Checklist
Work through the house systematically — one room completed before the next one begins. Partial progress in every room creates chaos. Completed rooms create momentum.

Kitchen
The kitchen is typically the most dense room in a home in terms of items-per-square-foot — and one of the most neglected in decluttering because “I might use it” is kitchen logic’s default setting.
Cabinets and drawers:
- Pull everything out before sorting back in. You cannot accurately assess what you have while it’s still stacked three deep.
- Eliminate duplicates ruthlessly. If you have four spatulas and use one, keep two and donate the rest.
- Anything that hasn’t been used in 12+ months — specialty appliances, single-purpose gadgets, serving pieces for parties you no longer host — donate or sell.
- Assess all food storage containers. Anything without a matching lid, cracked, stained, or warped goes.
Pantry and food storage:
- Discard expired goods completely. Don’t pack and move expired pantry items.
- Donate non-expired, unopened goods you won’t realistically use through a local food bank before your move date.
- Pack shelf-stable pantry items last — they add unexpected weight and take up box space that could go to more useful items.
Small appliances:
- If it doesn’t earn regular counter or cabinet space in your current kitchen, it won’t earn it in the new one. Be honest.
- Test every appliance before deciding to move it. A broken appliance being moved “to get fixed” rarely gets fixed.
What might go to storage from the kitchen: Entertaining pieces, large serving platters, specialized seasonal equipment (canning gear, holiday bakeware), and anything for which there’s no room in the new kitchen but which you’re not ready to part with.
Living Room and Common Areas
Living rooms accumulate slowly — books, décor, electronics, cushions, throw blankets, remote controls for things you no longer own — in ways that are easy to overlook because nothing in the room seems individually significant.
Books: Apply the honest one-pass test: would you actively recommend this book to someone? Would you reread it? If neither, donate it. Most towns have library donation programs or Little Free Libraries. Keep what you’d genuinely reach for.
Décor and display items: Move is the natural time to let go of décor that was “fine” rather than loved. Anything you’re moving because you’ve always moved it rather than because you want it in your new home belongs in the donate category.
Electronics and media: DVDs, old gaming equipment, cables for devices you no longer own, and electronics that “still work” but haven’t been turned on in years are common living room space-consumers. If you wouldn’t buy it again today, don’t pack it.
Furniture: Assess every piece against your new floor plan if you have one. Furniture that doesn’t fit the new space — in scale, style, or literally in dimensions — either sells, donates, or goes into storage while you decide. Don’t move furniture you know won’t work just to move it again six months later.
Bedrooms
Bedrooms are typically where clothing, linens, personal items, and sentimental belongings accumulate — the categories that are both most personal and most likely to be over-retained.
Clothing: The most effective approach is the seasonal sort: pull every item out, sort by season, assess each piece honestly. Keep what fits, what you wore in the past year, and what genuinely represents how you dress now — not how you dressed five years ago or aspire to dress eventually. Donate generously. Clearwater Valley winters demand practical clothing; if your wardrobe is full of items from a previous climate or lifestyle, the move is a natural reset point.
Linens: Most households have 50–100% more linens than they need. Keep two complete sets per bed, two sets of towels per person, and a modest backup. Everything beyond that is excess.
Dressers and nightstands: Clear all drawers completely before assessing. The back of a dresser drawer is where items go to be forgotten for years. Review everything that comes out.
Under-bed storage: The traditional home of things that were last used so long ago they’ve been forgotten. Clear it entirely and apply the four-category framework to everything you find.
Children’s rooms: Involve children appropriately in age-appropriate decisions. Moving is a natural opportunity to donate outgrown toys, books, and clothing to families who can use them — and framing it as generosity rather than loss often helps.
Bathrooms
Bathrooms are smaller rooms with higher clutter density than most people realize — primarily due to personal care products accumulated over time.
Medicine cabinet and under-sink: Discard all expired medications through a proper disposal program (many pharmacies accept them). Discard expired or genuinely unused personal care products. If you haven’t used it in six months, you won’t in the next six.
Towels and linens: Assessed above under bedrooms, but bathroom-specific: keep functional, well-maintained towels in the quantities you actually use. Worn, mismatched, or excess towels can be donated to animal shelters, which often welcome them.
Under-sink storage: Cleaning products, personal care supplies, and miscellaneous items stored here should all be assessed. Don’t move partial bottles of products you don’t use or haven’t opened in months.
Home Office
The home office is the room most likely to contain items that seem important but aren’t — particularly paper.
Documents and files: Sort all paper into three piles: retain, shred, recycle. Documents to retain indefinitely include tax records (keep seven years), legal documents, property records, medical records, and vital documents. Everything else is assessed honestly. Create a clearly labeled folder or binder for essential documents that travels with you — not in a moving box.
Electronics and cables: Test all electronics. Discard or donate non-functional equipment. The cable drawer is almost certainly full of cables for devices you no longer own — go through it completely.
Books and reference materials: Apply the same standard as the living room. Reference books for fields you’re no longer working in, outdated editions, and books kept for appearance rather than use are all candidates for donation.
Office furniture: Assess against your new space. A large desk that dominated a dedicated home office may not work in a multi-purpose room. Think through the new configuration before defaulting to moving everything.
Garage
The garage is the room most households underestimate in the decluttering process — and the one most likely to add significant weight and volume to a move if left unaddressed.
Tools and equipment: Keep what you own and use. Assess duplicates — most households have multiples of common tools accumulated from multiple households over time. Donate quality duplicates to people who need them or sell through online marketplaces.
Seasonal and sports equipment: This is the category most naturally suited to a storage unit rather than the moving truck. Camping gear, hunting equipment, fishing tackle, sports equipment with defined seasons, and recreational gear that won’t be needed immediately in the new home are all candidates for short-term moving storage rather than boxes on the truck.
Our guides on how to store camping gear in winter, how to store fishing gear in winter, how to store hunting clothes in the off-season, and what size storage unit for hunting gear cover prep and organization for all of these gear categories if they’re heading into storage alongside your move.
Hazardous materials: Do not move hazardous materials — partially used paint cans, solvents, pesticides, propane, and similar items. Many municipalities have hazardous waste disposal days or drop-off programs. Check local options and dispose responsibly before your move date.
Vehicles and large equipment: If you’re downsizing to a property with less storage space, vehicles, trailers, ATVs, and recreational equipment may need a vehicle storage solution while you sort out long-term arrangements.
When to Start Decluttering Before a Move
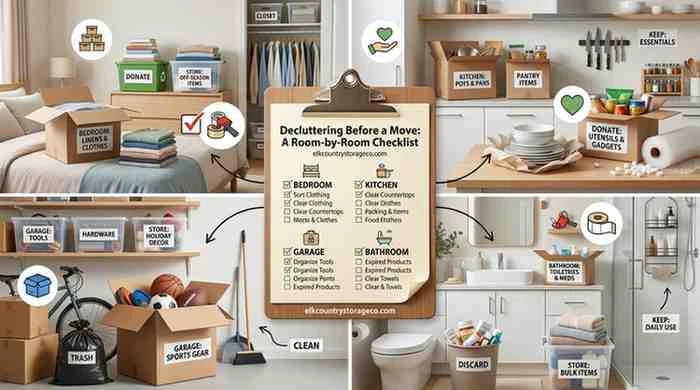
The most common mistake in pre-move decluttering is starting too late. A week before the truck arrives is crisis mode, not decluttering. Here’s a workable timeline:
8+ weeks out: Start with low-urgency areas — garage, basement, attic, spare rooms. These require the most time and generate the most donate/discard volume.
6 weeks out: Work through living areas, home office, and all bedroom closets. This is when you should also arrange storage for the “store” category items — having a unit reserved means you have somewhere to move those items off-site rather than letting them drift back into boxes.
4 weeks out: Kitchen, bathrooms, and final pass through all rooms. Begin packing non-essential items.
2 weeks out: Pack room by room, starting with least-used spaces. Only daily-use items remain unpacked.
Final week: Daily-use essentials, documents, and anything needed through move day itself.
Using Storage as Part of a Decluttering Move Strategy
One of the most useful tools in a decluttering-focused move is having a local storage unit available throughout the process — not just at the end. Here’s how it fits in:
Stage the “store” category off-site early. Once items are designated for storage rather than the moving truck, getting them out of the house immediately prevents them from drifting back into the “keep” pile. Moving them into a unit early clears space in the home for the sorting and packing process to continue cleanly.
Use storage to hold items while you list them for sale. If you’re selling furniture, equipment, or household goods, a storage unit keeps those items safe and accessible for buyers to pick up without cluttering your home through the selling process.
Bridge the gap between homes. Most moves involve at least a brief period where your belongings need somewhere to be while you transition. Month-to-month storage with no deposit required at Elk Country Storage Co. keeps that gap from becoming a logistical crisis.
Protect furniture and valuables during the transition. If the new home needs work before furniture goes in, climate-controlled storage keeps wood furniture, electronics, and other sensitive items protected during the wait rather than leaving them in an empty house or exposed moving environment. Our full guide on whether you need climate-controlled storage for furniture covers which materials specifically benefit from temperature protection.
Frequently Asked Questions: Decluttering Before a Move
When should I start decluttering before a move? Start at least eight weeks before your move date, beginning with storage areas, spare rooms, and spaces that accumulate items over time. Leaving decluttering until the final two weeks creates time pressure that leads to poor decisions — typically packing things you should have sorted.
Is it better to declutter before or after packing? Always before. Packing undecluttered belongings means sorting on the other end in an unfamiliar new space. Decluttering first reduces the volume you pack, lowers moving costs, and means every box that arrives at your new home has a clear purpose.
What should I do with items I’m not ready to get rid of but don’t need right away? Store them. A month-to-month storage unit gives you a low-commitment holding space for items in transition — seasonal gear, furniture that doesn’t fit the new layout, sentimental belongings you need time with, and anything you’re uncertain about. The storage unit size guide helps you find the right size for your volume.
How do I declutter sentimental items without regret? Give yourself more time, not less. Sentimental items should be sorted early in the process when you’re not under time pressure. Storage is genuinely useful here — items you’re uncertain about can go into a unit for a defined period (three to six months), after which you make a clearer decision without the emotional charge of a move underway.
What’s the fastest way to declutter before a move? Work room by room with no partial passes — complete one room before starting the next. Use four clear physical sorting zones (keep, store, donate, discard) in each room. Set hard donation deadlines and get items out of the house the same week they’re sorted. Involve everyone in the household.
Do I need a storage unit when moving? Not always, but it’s useful more often than people expect. Moving timelines shift, housing readiness creates gaps, and seasonal or oversized items are often better stored than moved. Month-to-month, no-deposit storage keeps the option available and affordable without a long-term commitment.
What items should always move with me rather than go into storage? Vital documents (passports, birth certificates, Social Security cards, property records, medical records), daily medications, jewelry, and irreplaceable personal items should travel with you directly — not in a moving truck or storage unit. Everything else can be assessed against the four-category framework.
Why Elk Country Storage Co. for Your Moving Declutter

When decluttering before a move creates a category of items that aren’t coming to the new home yet, you need a storage solution that’s easy to start and easy to end — not one that adds a deposit, a long-term contract, and a phone call to cancel to an already busy moving process.
Elk Country Storage Co. serves households throughout Kamiah, Kooskia, Orofino, Harpster, Stites, Grangeville, and the greater Clearwater Valley with:
- No deposit required — Start a unit during your decluttering process without tying up money you need for the move
- Month-to-month rentals — Stop paying the moment you’ve sorted out what’s in the unit
- 24/7 gate access — Drop off items from your decluttering sessions on your schedule
- Unit sizes from 5×5 to 10×30 — Small units for seasonal gear and overflow, large units for full household staging
- Climate-controlled storage — For furniture, electronics, and belongings that need protection during a move transition
- Two convenient locations — Kamiah at 303 Locust Rd and Kooskia at 4689 Hwy 13 South
- Online reservations — Reserve your unit during the planning phase so it’s available when the sorting starts
Conclusion
A decluttering before moving checklist isn’t about being ruthless with your possessions — it’s about being intentional with them. Moving is one of the clearest natural opportunities to assess what you own, decide what earns a place in your next home, and leave behind what doesn’t.
Done room by room, with enough lead time and a clear sorting framework, decluttering before a move transforms the process from chaos into something close to a fresh start. The moving truck carries less, the unboxing goes faster, and the new home starts as a space that works — rather than a holding area for everything that used to work somewhere else.
For items that need time, a temporary home, or simply aren’t moving with you yet, Elk Country Storage Co. is here with no-deposit, month-to-month storage in Kamiah and Kooskia that fits your timeline and your budget.
Reserve Your Decluttering and Moving Storage Unit Today
Call or text: (208) 630-3753 Email: [email protected] Reserve online: elkcountrystorageco.com/reserve
Kamiah: 303 Locust Rd, Kamiah, ID 83536 Kooskia: 4689 Hwy 13 South, Kooskia, ID 83539
✓ No deposit required ✓ Month-to-month rentals ✓ 24/7 gate access ✓ Climate-controlled options available
Serving Kamiah, Kooskia, Orofino, Harpster, Stites, Grangeville, Lewiston, and the greater Clearwater Valley, Idaho.
]]>